Monday, March 30, 2020

Black Bean Brownies

Prepare to be pleasantly surprised by this brownie recipe. If there is such thing as healthy brownies then here it is - made of oats, coco powder, date syrup and ... wait.. black beans! Yes, it is delicious just like your regular 'bad' one version.


I was very skeptical until I tried this recipe.  You would never tell there are beans in there. It's also quick, one bowl recipe. Did you notice there is no eggs, dairy and fat in this recipe? 

Notes

- Choose topping to your liking. I used chocolate chips and chopped walnuts. It could be raisin, almonds, pistachio or any other nuts, or chopped dry fruits or berries, or even some peanut butter swirls or marshmallow.

- If you don't have date syrup, use 1.cup of maple syrup (it's less sweet than date syrup) or black-strap molasses. Also, maple syrup is thinner so you may want to add extra spoon or two of oats to get the right consistency of batter. 

- I use quick oats for this recipe, but, I'm sure old-fashioned rolled oats can be used as well. Do not use steel-cut one though. Also, if you like your brownies denser, add extra couple tablespoons of oats.

- You will need kitchen processor to make the batter and silicon baking pan. 

Black Bean Brownies

For about 9" silicone pan :
  • 1.5 can black beans, drained and rinsed
  • 1/2 cup date syrup (see notes above for replacement)
  • 3 tbsp raw cane sugar (or your choice of sugar)
  • 1/4 cup plant-based milk
  • 1/2 cup quick (or rolled old fashioned) oats
  • 1/4 cup coco powder
  • 1 tsp baking powder
  • 1/4 tsp baking soda
  • 1 tbsp ground flax seeds
  • vanilla and, optionally, almond extract
  • 1/4 c chocolate chips
  • 1/4 c chopped walnuts 
- Preheat an oven to 375F.

- In a kitchen processor, blend together first 4 ingredients (beans, syrup, sugar and milk) for minute or two until smooth.

- Add remaining ingredients and continue to blend for about two minutes until you'll get semi-smooth batter. Piece of advise - place coco powder first and then cover with oats and other remaining ingredients. It will save you from coco powder getting airborne :)

- Place silicone pan on a metal baking sheet and pour batter into your silicone pan. Top with a chocolate chips, chopped walnuts and bake for about 35-40 minutes.

- Remove from oven and let your brownie cake to sit until it cools down completely. It will sink down but don't be alarmed by this. When it cools down completely, place plate on top, flip it over and then place serving plate on top and flip again to have your cake sitting pretty with topping side up.

- It can be kept on a counter, uncovered, for a couple days. It should be good for a several days, if you keep it in a fridge, but I never tried it. Usually it was gone by next day :)


*******************************************************************************************************************************


IN PICTURES

 It's not optical illusion - yes, it's beans and I'm making brownies :)

On a left, it's close-up of oats, flax and baking powder.


 I mixed coco powder in with a spoon first to avoid coco "cloud"


 You won't get perfectly smooth batter, but that's ok, it should add to a texture.


 Before going into an oven

 Done!


 Just perfect moist brownie texture and so yummy!


Slightly warm with a chocolate chips still melted. Pure pleasure.

Friday, March 6, 2020

Grechaniki

Grechaniki - authentic Ukrainian dish which resembles a patty made of cooked buckwheat mixed with other ingredients. Here is a vegan version of it, popular in Ukraine during a lent period. 


Authentic version of this dish often includes some kind of meat mixed with buckwheat, but for the period of lent, meat is replaced with vegetables - cooked carrots, onion, mushrooms, potato. Called in Ukraine grechaniki, I have translated them as patties, but perhaps more appropriate would be to call them veggie-buckwheat burgers. 

Notes

- Recipe calls for small amount of oil for frying, but you can easily avoid oil altogether and fry grechaniki on a dry skillet. If you stick to whole-food-plant-based-no-oil way of eating, it is just what you need - delicious food without additional oil! 

- I like to use buckwheat from Eastern European groceries - it is raw, toasted and, after you cook it, has great texture and flavor. You will never get that delicious buckwheat kasha using buckwheat from our regular American supermarket. Those who tried, knows what I'm talking about. Although for the purpose of this recipe, regular supermarket buckwheat may work as, when cooked, it has wet and mushy consistency somewhat helpful when you make patties.

- Traditionally they served hot, with sour cream. As I'm dairy-free now, I love to eat them with tahini sauce or hummus.

- As an option replace half of potato amount with mashed sweet potato.

- Mushrooms are optional. When I don't have mushrooms I just omit then and add a little granulated garlic and onion, a teaspoon of each, to add more flavor.

Grechaniki - Ukrainian Buckwheat Patties

  • 3 cups cooked buckwheat
  • 1 large onion, chopped
  • 2 carrots, coarsely grated
  • 16 oz pack of white or other mushrooms (optional)
  • 3 potatoes, peeled, cooked and mashed
  • 1/2 tsp salt 
  • 1/3 tsp black pepper
  • 2 tbsp oil for frying (avocado oil)
- On a dry skillet (or lightly oiled), cook onion until soft, add carrot and continue to cook until soft. If needed add a splash of water.

- In a small pot, bring water to a boil, then put whole mushrooms and cook 5-7 minutes. Drain.

- In a kitchen processor, pulse onion, carrot and mushrooms until finely chopped.

- In a large bowl, place all ingredients - buckwheat, mashed potato, processed cooked onion, carrot, mushrooms, salt and black pepper and mix it all together nicely until you will get sticky mixture that you can make patties out of it.

- Make patties and cook them on slightly oiled heated skillet on both sides. They also can be baked in an oven at 400F until golden-brown. In this case you don't need oil at all, just place patties on a parchment paper and bake until crispy on outside.

- Enjoy!


*******************************************************************************************************************************


IN PICTURES


 I like to use my electric grinder as it allows to keep nice texture. Here is I'm running carrots and onion right into a large bowl where I transferred already my mashed potato in. Boiled mushrooms are waiting their turn..

 All ingredients are here.

 You can see that mixture holds together thanks to a mashed potato. If your mixture is still dry and falls apart, I would recommend to run half of mixture in a processor.

 I like to use my handy scooping tool.

 Here I fry patties on a dry skillet for myself. For others I cooked them on a little splash of avocado oil. I can tell you, there was no noticeable difference between them. So why extra calories :)


 Great texture but still holds together.
 Here grechaniki served with hummus. See my previous post how to make healthy, quick and delicious hummus.


 This (and next two pictures) are grechaniki made without mushrooms, with sweet and regular potatoes. These were baked in an oven. Delicious and healthy! I also didn't use processor - just mashed cooked potatoes with potato masher and then added all remaining ingredients continuing mashing. Turns out really nice chunky/creamy texture.


Monday, March 2, 2020

Easy No-Oil Hummus

Here is the 5-minute recipe for better-than-store-bought hummus. This is a truly healthy recipe, lower in calories than your regular hummus because it uses no additional oil. It's a basic recipe, simple and delicious, great as it is. But you also can customize it adding another components to get your favorite hummus flavor. 
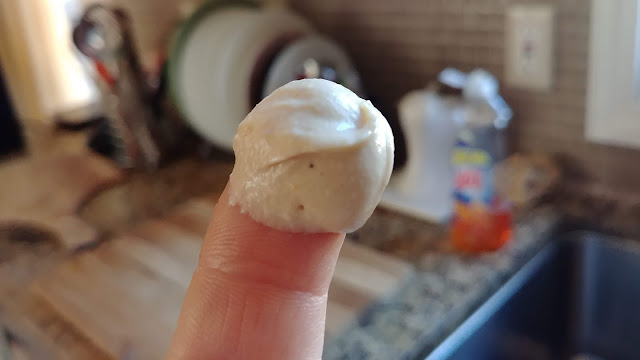


The best hummus is just 5 minutes away, no need to run to a store. Just keep some canned chick peas and tahini on hands all the time and you will be able to whip very tasty hummus in no time whenever you want. This is the basic recipe for hummus. You can add an extra ingredients to your liking (see list of suggestions below) if you wish, but I like to make this, the very basic hummus, and then to serve it with different toppings - see pictures below.

Notes

- As additional ingredients to throw in your blender could be: marinated pepper, roasted garlic, herbs, fresh or dry, curry paste, lemon zest, turmeric, etc. Just keep in mind, that  additional ingredients can change viscosity of your hummus so coordinate it with quantity of liquid from a can. Also extra ingredients will shrink the time your hummus can keep in a fridge. This basic hummus will keep in a fridge for about 5 days. If, for instance, you decide to process your hummus with a fresh basil, or marinated pepper, then your hummus will keep in a fridge for about 2-3 days.

- Hummus is great as a dip with pita or vegetables, but it's even better as one of the elements of "Buddha bowl" or as spread for a toast, topped with a piece of cooked or raw veggie.

- This recipe uses liquid from the can. Sometimes it is more liquid than usual, then you'll get thinner hummus. If you absolutely need thick hummus than reserve part of the liquid and add it gradually as needed to get desired consistency.

- I use high-speed Ninja blender, it makes really smooth hummus. Vitamix would do a great job as well, I think. If you have neither, use kitchen processor, just let it run longer when you blend your hummus.

- I purposely use white vinegar, not lemon, when I make hummus. I just like it better. Give it a try!

Easy No-Oil Hummus

  • 1 can chick pea (garbanzo beans) with liquid
  • 1 tbsp white vinegar
  • 3 tbsp tahini
  • 3 garlic cloves
  • 1/3 tsp cumin powder
  • 1/3 tsp cayenne pepper (optional)
- Throw all ingredients into blender cup and process until smooth. I like to run two long cycles on my Ninja blender to get very smooth and silky consistency.

- Enjoy!


*******************************************************************************************************************************


IN PICTURES


 Here is my red cabbage and lentils leftovers with some homemade kimchi and hummus. Scrumptious.
 Toasted cocktail bread, rubbed with garlic, topped with hummus, canned kidney beans and sprinkled with smoked paprika. Garnished with cilantro leaf. Great hors d'oeuvres for a party!


 I love, love use hummus as saucy part of my impromptu Buddha bowl - collard greens sauteed with onion and spices, red cabbage salad leftovers, toast and fresh tomato, all topped with hummus and sprinkled with aleppo chili flakes.


Toasted bread with spoon of hummus and sauteed collard greens. Hummus is yellow-ish because I added some turmeric this time.