Showing posts with label My Staple Food. Show all posts

Monday, March 2, 2020

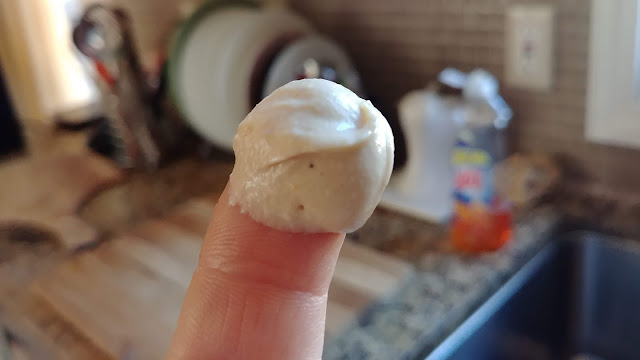
Easy No-Oil Hummus

Here is the 5-minute recipe for better-than-store-bought hummus. This is a truly healthy recipe, lower in calories than your regular hummus because it uses no additional oil. It's a basic recipe, simple and delicious, great as it is. But you also can customize it adding another components to get your favorite hummus flavor. 


The best hummus is just 5 minutes away, no need to run to a store. Just keep some canned chick peas and tahini on hands all the time and you will be able to whip very tasty hummus in no time whenever you want. This is the basic recipe for hummus. You can add an extra ingredients to your liking (see list of suggestions below) if you wish, but I like to make this, the very basic hummus, and then to serve it with different toppings - see pictures below.

Notes

- As additional ingredients to throw in your blender could be: marinated pepper, roasted garlic, herbs, fresh or dry, curry paste, lemon zest, turmeric, etc. Just keep in mind, that  additional ingredients can change viscosity of your hummus so coordinate it with quantity of liquid from a can. Also extra ingredients will shrink the time your hummus can keep in a fridge. This basic hummus will keep in a fridge for about 5 days. If, for instance, you decide to process your hummus with a fresh basil, or marinated pepper, then your hummus will keep in a fridge for about 2-3 days.

- Hummus is great as a dip with pita or vegetables, but it's even better as one of the elements of "Buddha bowl" or as spread for a toast, topped with a piece of cooked or raw veggie.

- This recipe uses liquid from the can. Sometimes it is more liquid than usual, then you'll get thinner hummus. If you absolutely need thick hummus than reserve part of the liquid and add it gradually as needed to get desired consistency.

- I use high-speed Ninja blender, it makes really smooth hummus. Vitamix would do a great job as well, I think. If you have neither, use kitchen processor, just let it run longer when you blend your hummus.

- I purposely use white vinegar, not lemon, when I make hummus. I just like it better. Give it a try!

Easy No-Oil Hummus

  • 1 can chick pea (garbanzo beans) with liquid
  • 1 tbsp white vinegar
  • 3 tbsp tahini
  • 3 garlic cloves
  • 1/3 tsp cumin powder
  • 1/3 tsp cayenne pepper (optional)
- Throw all ingredients into blender cup and process until smooth. I like to run two long cycles on my Ninja blender to get very smooth and silky consistency.

- Enjoy!


*******************************************************************************************************************************


IN PICTURES


 Here is my red cabbage and lentils leftovers with some homemade kimchi and hummus. Scrumptious.
 Toasted cocktail bread, rubbed with garlic, topped with hummus, canned kidney beans and sprinkled with smoked paprika. Garnished with cilantro leaf. Great hors d'oeuvres for a party!


 I love, love use hummus as saucy part of my impromptu Buddha bowl - collard greens sauteed with onion and spices, red cabbage salad leftovers, toast and fresh tomato, all topped with hummus and sprinkled with aleppo chili flakes.


Toasted bread with spoon of hummus and sauteed collard greens. Hummus is yellow-ish because I added some turmeric this time.

Wednesday, August 21, 2019

Ukha - Ukrainian Fishermen's Soup

It's a very simple nevertheless best recipe for a popular Ukrainian Catch-Of-The-Day Fish soup called Ukha. Don't be discouraged by humbleness of this recipe. I've being through many versions of it - this one is THE best and THE simplest one.

Blog's Category: Effortless, Healthy, International, My Own Fast and Easy, My Staple Food, Seafood, Soup, Ukrainian


Traditionally this soup is made of whatever fishermen catches this day. We have spent a beautiful summer day fishing on a local lake LaDue and our catch-of-the-day were several small white and yellow perches and some bluegills. Just enough for a pot of Ukha, Personally, I prefer to cook soup rather than fry my catch, because usually it's a small fish which is fantastically tender cooked in a soup and it is easier to separate bones from a flesh when small fish is boiled, not fried.

It is a special, acquired skills to deal with a bones in small fish. That's why I posted some pictures to share how I do this. Trust me, beautifully tender, delicious flesh of a small fish is  worthy all the work! 

Although if you are not up to fishing and de-boning your fish, but would like to try Ukha, just go to a store and buy a fish of your choice. In this case I would get trout, but any fish will do.

One more advise. If you have being fishing and come home late tired, gut, scale and clean your fish right away anyway. Then place it in a container, fill with cold water just to cover a fish, add about 1 tablespoon of salt (per every liter of water) and place in a fridge. It can be kept like this for up to 3-4 days before your get to cook it.

Warning for a sensitive people - don't read this paragraph. This is a special note for fishermen regarding fish head. If you've being lucky to catch big fish, use a head for this soup too, it gives a lot of flavor to a soup, just don't forget to cut out and discard gills. If fish is small, like mine here, don't bother with heads, just cut them off and discard.

Ukha

  • about 3 lbs of fish, gutted, scaled and cleaned
  • 2 liter of water
  • 1 onion, finely chopped
  • 3 potatoes, peeled and diced (I like to dice relatively finely 1/2" x 1/2")
  • salt to taste
  • 7 whole black peppercorn (or mixed peppercorn)
  • 2 bay leaves
  • 1 tbs dill (fresh preferably, I used frozen)
- Place pot with water on a stove, add potato, onion, bay leaves and peppercorn. Bring to a boil. Simmer until potato cooked through.

- Carefully add all your fish in a pot. Do not stir! Bring soup to a boil, turn heat down and simmer for 10 minutes.

- Add salt. Carefully swish a soup to dissolve and distribute a salt, trying not to break a fish. It is critical to add adequate amount of salt, it should be just right - not too much, not too little.

- Add dill. Turn heat off. Your soup is done!

- Enjoy! When it's Ukha with a bone-in fish, I like to serve fish separately from soup itself, like on my photo below. It makes it easier to deal with bones.  The process matters :)


Notes:

- As of leftovers, I like to keep fish and soup in a separate containers as well. It is much easier to enjoy it next day too!

- I insist that you stick to this recipe to the word. It's very few ingredients but each of them matters. Without any single ingredient in this recipe, or with any additional ingredient, you won't get My Best Ukha ;) 

- The pictures below may seem underwhelming, but you have to believe my word that it is The Best Ukha. Try.


*******************************************************************************************************************************


IN PICTURES

 Whenever possible, I try to use red onion as it has more anti-oxidants than white one. But white onion can be used here as well.

 Usually I place pot with water on a heat and as it is brought to a boil I chop and add potato, onion, bay leaves and pepper.


I used a mix of pink, black and green peppercorns.


 Cook potato until it's completely soft, before adding a fish.

 Here is our catch. It was kept in a fridge in salted water, like this, for a two days before I get to cook my ukha. Because my fish was in a salted water for a two days, I will be careful when adding salt to my soup.

 I placed fish carefully on a top of potato. No stirring!. Now just wait until it start to boil, then turn heat down and simmer for 10 min.

 I don't use fresh dill too often. That's why when I buy fresh dill, I like to chop it and keep in a freezer until I need it. There is a few dishes, like this, when it's no-go without fresh(frozen) dill.

 Frozen dill.

 Dill is added, bringing simmering down. Now one more minute to start simmering again and it's done!

 Serving soup separately, in a small bowl. Fish is on a separate plate too.
 Yumm. Start eating fish from a back, using your fingers, with a little help from a fork :) Take your time, dealing with bones requires attention and some fish anatomy knowledge. Happy discoveries!

 After each fish bite don't forget to indulge on a flavorful fish broth with a pieces of melting-in-a-mouth potato and tiny bits of soft onions.
 It's a bit of dirty but delicious work to eat small fish! The most expensive fish would never taste as a piece of small fish, such as this white and yellow perch.

 Step by step, back fins with a row a tiny bones, and vertebrae with tail fins goes on a 'discard' side of a plate. Now 'huge' piece of other half of fish (minus ribs) are all de-boned and available for enjoyment.

It was fun and it was delish. I hope you will do a favor to yourself and cook Ukha some time soon. 

Friday, April 26, 2019

Chicken Liver Pate

Silky smooth and amazingly delicious, this chicken liver pate-mousse is addictive. Garnished with pistachio nuts and served with simple toasts, it is destined to become a hit at your next party.

Blog's Category: Chicken, Finger Food, Holidays, Hors D'oeuvre, International, My Staple Food, Ukrainian, Jewish


I've made a lot of different types of liver pate before - it is very popular dish in my native country, Ukraine. I think this recipe is the best of all. It uses chicken liver. Because of a fine texture of chicken liver, it is the best type of liver for pate IMHO. Try this recipe, if you like liver in general, I'm sure this recipe will become your favorite.  

Chicken Liver Pate-Mousse

  • 1 lb chicken livers
  • 1 stick + 2 tbsp + 1 tbsp unsalted butter, room temperature
  • 1 onion, thinly sliced
  • 1/2 cup dry Marsala wine (or other white dry white)
  • salt and black pepper to taste
  • 2 tbsp chopped parsley
  • 2 tbsp thyme leaves
  • 1/2 cup chicken stock (made of bouillon cubes is fine)
  • 1 tbsp chopped pistachio nuts
- Cook onion in 2 tbsp butter in a large skillet on a medium hit until onion soft and translucent. Add chicken livers, salt and pepper and cook it for about 5 minutes, stirring occasionally. 

- Add Marsala to chicken livers. Cook for 2 minutes. 

- Add chicken broth, parsley and thyme to livers. Cook, turning livers, for about 5 more minutes until they cooked through. 

- Remove skillet from hit and let it cool down for about 10 minutes. 

- Transfer livers with all juices to kitchen processor and blend until smooth, for about  1 minute (it depends on your machine). Then add stick of soft butter, cut in pieces, while continue to blend, until it smooth and silky. Taste, add salt and pepper if needed.

- Transfer pate in a glass wide-mouth jar. Melt 1 tbsp butter in microwave and pour on top of pate to cover it completely. Sprinkle pistachios on top. Cover with lid. 

- Keep in a fridge. It can hold in a fridge for up to 10 days.

- Enjoy!


Notes:

- Sure you can substitute Marsala with other wine, but Marsala would be ideal, it has that great unique flavor.

- You can make your pate chunky by reserving couple pieces of cooked liver and adding them, chopped, into mousse after it's done, right before transferring it to a jar.


*******************************************************************************************************************************

IN PICTURES

I will post pictures from a cooking process after I will be cooking this pate next time ;)


Friday, February 15, 2019

Vegetarian Chickpea and Butternut Squash Pilaf

Don't let word vegetarian to trick you. This pilaf is full of flavor and utterly delicious. It is an easy and healthy recipe, you will love it! 

Blog's Category: Healthy, My Staple Food, Pilafs, Vegetarian


I cooked this pilaf numerous times and it was always up to expectation. Even my meat adoring husband loves this pilaf. For vegetarians it is one-meal-dish, full of nutrition and filling. 

This pilaf is really good with some pickled vegetables on a side, olives, pickles or sauerkraut. It is also a rich side dish for any meat dish.

Note 

- Recipe calls for basmati rice, but when I don't have it, I often use jasmine rice. 

- If you are not fan of carrots, grate or chop it finely, but do not omit it. You can even process raw carrots into course crumbles before adding it to a pilaf.

- We will cook pilaf, from beginning to the end, in one pot. Prepare a large, oven-proof pot, preferably wide and low (just for your convenience). 

- It is a limited ingredients for this pilaf. Do not omit any. Each of them has its role in a dish. You will be rewarded with a result - full-bodied, nutritious, comfort-food meal.


Vegetarian Chickpea and Butternut Squash Pilaf

  • 2 large onions, peeled and diced
  • 3 large carrots, peeled and cut into thick matchsticks (or grated)
  • 1 medium butternut squash, peeled, seeded and diced (small dices)
  • 2 heads of garlic, peeled and roughly chopped
  • 1 can garbanzo beans (chick peas), rinsed
  • 3 cups basmati rice, rinsed thoroughly and left in water to soak until required
  • 1 cup flavorless olive oil
  • 2-3 tsp salt
  • 3 cups boiling water
  • 1 tsp cayenne pepper (for mild spiciness)

- Prepare your ingredients as instructed above. As you start cooking, process will run fast.

- Turn oven on to 370F.

- Pour all olive oil in a pot and heat it up. Just before it starts to smoke, add onion and cook stirring until it soft and translucent. 

- Add carrots and butternut squash. Cook for 5 minutes, stirring occasionally.

- Drain your rice.  Add rice, garbanzo beans, garlic, salt and pepper to the pot with vegetables. Stir carefully all together, add 3 cups of boiling water. 

- Cover pot tightly with a lid or foil. Transfer to a pre-heated to 375F oven for 1 hour. 

- Enjoy!


*******************************************************************************************************************************


IN PICTURES


For Middle Eastern pilafs, as it was in South-Asian republics of USSR, traditionally, carrots were cut into thick sharp-edged matchsticks. I do the same. But sometimes, people, kids especially, don't like those carrot pieces in pilaf. Feel free to chop carrots finely, perhaps in a kitchen processor. Or grate them. Small pieces of carrots, cooked in oil first and then cooked in rice, will be rather invisible, still giving sweetness and flavor to whole dish. 

 It seems like it is a lot of oil. Do not be afraid to use that much oil. It is customary using a lot of oil in pilafs. Trust me, I regret using less when I tried.


 I'm not sure why this time I decided to use smaller pan to fry vegetables and then transfer all into glass dish before popping it in an oven. Please do as I instructed in a recipe - use a large, oven-proof pot for everything, cooking on a stove, adding all ingredients and then cooking in an oven.


 Picture does not tell you how yummy it is. Well... it is!

You may think this pilaf does not have any flavorful spices! Then you probably have no idea how much flavor all these ingredients have, well enough to forget about any kind of regular spices ;) Please try this recipe as is!