Showing posts with label Chicken. Show all posts

Friday, April 26, 2019

Chicken Liver Pate

Silky smooth and amazingly delicious, this chicken liver pate-mousse is addictive. Garnished with pistachio nuts and served with simple toasts, it is destined to become a hit at your next party.

Blog's Category: Chicken, Finger Food, Holidays, Hors D'oeuvre, International, My Staple Food, Ukrainian, Jewish


I've made a lot of different types of liver pate before - it is very popular dish in my native country, Ukraine. I think this recipe is the best of all. It uses chicken liver. Because of a fine texture of chicken liver, it is the best type of liver for pate IMHO. Try this recipe, if you like liver in general, I'm sure this recipe will become your favorite.  

Chicken Liver Pate-Mousse

  • 1 lb chicken livers
  • 1 stick + 2 tbsp + 1 tbsp unsalted butter, room temperature
  • 1 onion, thinly sliced
  • 1/2 cup dry Marsala wine (or other white dry white)
  • salt and black pepper to taste
  • 2 tbsp chopped parsley
  • 2 tbsp thyme leaves
  • 1/2 cup chicken stock (made of bouillon cubes is fine)
  • 1 tbsp chopped pistachio nuts
- Cook onion in 2 tbsp butter in a large skillet on a medium hit until onion soft and translucent. Add chicken livers, salt and pepper and cook it for about 5 minutes, stirring occasionally. 

- Add Marsala to chicken livers. Cook for 2 minutes. 

- Add chicken broth, parsley and thyme to livers. Cook, turning livers, for about 5 more minutes until they cooked through. 

- Remove skillet from hit and let it cool down for about 10 minutes. 

- Transfer livers with all juices to kitchen processor and blend until smooth, for about  1 minute (it depends on your machine). Then add stick of soft butter, cut in pieces, while continue to blend, until it smooth and silky. Taste, add salt and pepper if needed.

- Transfer pate in a glass wide-mouth jar. Melt 1 tbsp butter in microwave and pour on top of pate to cover it completely. Sprinkle pistachios on top. Cover with lid. 

- Keep in a fridge. It can hold in a fridge for up to 10 days.

- Enjoy!


Notes:

- Sure you can substitute Marsala with other wine, but Marsala would be ideal, it has that great unique flavor.

- You can make your pate chunky by reserving couple pieces of cooked liver and adding them, chopped, into mousse after it's done, right before transferring it to a jar.


*******************************************************************************************************************************

IN PICTURES

I will post pictures from a cooking process after I will be cooking this pate next time ;)


Friday, June 16, 2017

Chicken Breast and Spinach Meatloaf

It's not your regular meatloaf, it's a king of all meatloaves. You will agree with this strong statement after you are going to try this recipe. With just a few ingredients, you can perfect your meatloaf skills and, perhaps, add another recipe to your family favorites.   

Blog's Category: Chicken, Healthy, My Own Fast and Easy


In a Few Words ...

- I was about to make my usual chicken breast patties called "kotleti" but got lazy.. After all scooping mix, forming patties, frying them... Too much work, I thought, and decided to make meatloaf. For an oven baked meatloaf, it is important to add ingredient that will prevent meatloaf from being dry. Spinach, I had at a time in my fridge and couple splashes of cream will definitely make my meatloaf juicy and delicious. It was a great idea - meatloaf turned very good, tender, juicy, flavorful.

- As any meatloaf, this meatloaf is a great choice for potluck, picnic or party at a park. It is great served with any side of your choice. On my pictures, you are seeing meatloaf, still warm, on a piece of multi-grain crisp bread and also with a side of rice, generously drizzled with chili oil.


Chicken Breast and Spinach Meatloaf


  • 1 large bunch of spinach
  • 1 lb chicken breast, ground
  • 2 eggs
  • 1/2 c cream
  • 2 tsp salt
  • 1 tsp black pepper, ground
  • olive oil to grease a baking dish
  • 1/3 c grated parmesan cheese (optional)
- Preheat an oven to 380F.

- Blanch spinach in a boiling water for a few seconds. Drain, then rinse under cold water, squeeze nicely to get rid of extra water and chop. 

- In a large bowl, mix together ground chicken breast, chopped spinach, cream, eggs, salt and pepper.

- Transfer meat mixture into oiled baking dish, top with a parmesan and cook in an oven for about 40 minutes or until it is completely cooked through and top is golden-brown.

- Remove from oven, let it rest for about 15 minutes and enjoy!


*******************************************************************************************************************************
In Pictures


Here you see one of my favorite tools - dough mixer, sturdy wired heavy-duty hand mixer  I use it to mix thick mixes, when spoon or whisk are just not good enough to do a job.


It's a good thing I made a double batch... meatloaf disappeared in no time :)


Meatloaf on a top of rice, drizzled with my Szechuan chili oil..

Friday, May 12, 2017

Chicken Tsimes

This hearty Jewish staple dish will warm your soul and please your taste buds. Few simple steps, several common ingredients and you have your new favorite chicken recipe!

Blog's Category: Chicken, Effortless, Healthy, International


Just a Few Words About

- This recipe comes from my old Jewish recipe book, that I brought from Kiev many years ago. I love this book and have made a lot of recipes from it. Some of them, like this one, has become my family staples.
- If you are curious, that is a squid ink pasta on the picture above I served my Chicken Tsimes with. Its deep black color looks very dramatic, paired with a bright orange colors of chicken. I would mention that color is the only what that differ this squid ink pasta from a regular pasta, no fishy flavor whatsoever, for good or for a bad :)
- For those who doesn't like cooked carrots I would suggest to give it a try. All ingredients are slow-cooked for a while so the flavors of chicken, carrots, onion and prunes are mingled and fused together into a wonderful and unique flavor, distinct to this dish.


Tips

- It is better to use heavy cast iron pot to cook tsimes, such as a dutch oven. If you don't have it, no worry, pick a pot with a thick bottom and do your cooking at a very low heat to avoid burning.

- Of course, you can add some more ingredients suiting this dish, like garlic, bay leaf, cayenne pepper. But, to be honest, as much as I love those ingredients, they are not crucial here, really :) I would say they can even destruct from the main theme of this chicken dish - lightly-sweet, fruity, yet savory aroma.

Chicken Tsimes


You will need:
  • about 6 skinless boneless chicken thighs
  • 3 large carrots, coarsely grated
  • 1 large onion, thinly sliced
  • 3 tbs olive oil for cooking
  • 1 cup dry prunes, pitted
  • 2 cups chicken broth (or 3-4 chicken broth cubes per two cups of hot water)
  • 1 tsp salt (or to taste)
  • ground black pepper to taste

- Heat oil in a large dutch oven, add chicken and cook for 2 minutes, at medium heat, turning chicken pieces once or twice.


- Add sliced onion, carrot, prunes, salt. Cook for 5 minutes, stirring occasionally.

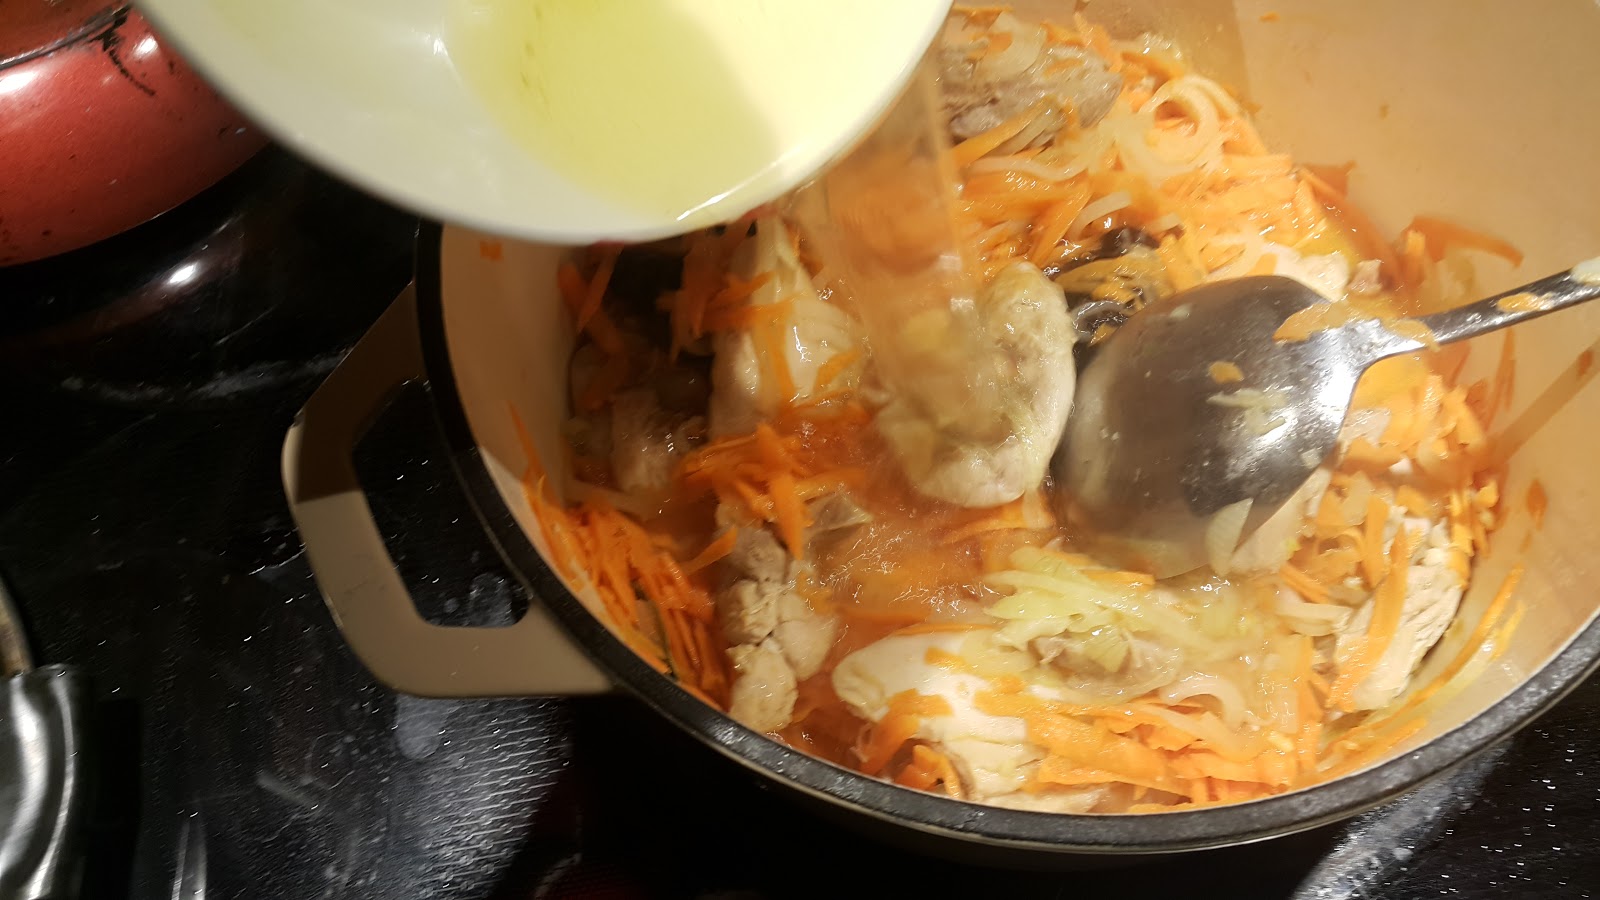
- Add chicken broth, stir, cover with a lid, switch to low heat. Simmer for about 1 hours, stirring couple times, until carrots and onion will become very soft, almost fall apart, creating nice chunky sauce.

- Add black pepper, taste, adjust salt if needed (keep in mind that this dish is better under-salted than over-salted). Enjoy!


*******************************************************************************************************************************
In Pictures


As I often do, I add ingredients as I chop/slice/grate them while other ingredients are cooking in a pot. Same here - I sliced onion while chicken was cooking.


.
.. and I peeled and grated my carrots when onion and chicken were already in a pot. If you prefer to do all your veggie prep work first - fine, then just add them all together.


Friday, March 18, 2016

Chicken BBQ Lollipops

Success is guaranteed! Your kids will be begging for it! This chicken-on-a-stick is the most humble recipe for chicken drumsticks you ever come across. Don't take my word for it - try it!

Blog's Category: My Staple Food, Kid's Favorite


Intro

I make this simple oven roasted BBQ chicken for years. But it is just recently, making this easy BBQ chicken, I prefer using drumstick rather than thighs or leg quarters. Why? Because I can make these awesome lollipops out of them! They look funky and taste amazing, kids love them and, it looks like, adults love them even more.

The same kind of chicken lollipops can be made of drummets, a bottom section of whole chicken wing. In this case they will be smaller. It's a good idea to use drummets for chicken lollipops if you are planning to serve them as hors d'oeuvres. Actually, you will be surprised, how small will be your chicken lollipops made of drumstick too - they shrink a lot during cooking.

There is a couple of important steps you have to obey. Do not be tempted to make your own way. Stick to the recipe and you'll be rewarded with some delicious recipe you will be passing from generation to generation :)


What is it?

Chicken drumsticks, made in a lollipop shape, roasted in an oven, and then finished with a BBQ sauce of your choice.


Taste Description

Sticky caramelized BBQ, covering these little meaty lollipops... Juicy, naturally flavorful meat... Nice secure grip onto warm bone.. You've got the picture, right?


How to Serve

Serve right away. Keep leftovers in a fridge for up to 5 days. 

For serving, you can use fancy paper frills, if you wish, but I prefer the look and feel of bare, warm bone. These lollipop bones-handles will cool down pretty quickly and in a couple of minutes you will be able to hold it with a bare hands.

Chicken BBQ Lollipops


  • dozen of  chicken drumsticks 
  • about 1/2 bottle of you favorite Bar-B-Q sauce
  • 2 tbs of sriracha sauce, optional (do not use this hot sauce if you or kids don't like spicy food)

- Take drumstick. Using your biggest and sharpest heavy chef's knife, cut right through the bottom joint to make it flat - your drumstick should stand vertically and firmly on a baking sheet. Then, in a circular motion, cut around upper joint to separate skin and tendons from a joint. Push skin down, away from an upper joint. Cut through the middle of upper joint to remove surrounding cartilage and clean the bone (see pictures below). 

- Preheat oven to 380F. Tacking skin underneath, place chicken lollipops on a greased baking sheet or use silicon baking pads as I did.  Do not salt, pepper or season in any way your lollipops! (This is important!). Bake until drumsticks are cooked through, skin is tan, a bit bubbly and crisp. It will take about 30-40 minutes depending on a size of your chicken drumsticks.

- Pour BBQ sauce into a small bowl. Add sriracha (if using) and stir. 

- When cooked through, remove drumsticks from an oven. Please note that if you cook a lot of lollipops, most likely, you will have some juices in a bottom of pan or baking sheet. Then transfer lollipops onto a plate and discard (or reuse somewhere else) juice from a baking sheet (And this is important too!)

- In a twisting motion, dip each lollipop into BBQ sauce and place back on a baking sheet. Keeping the same temperature, finish chicken lollipops in an oven until BBQ sauce caramelizes into a sticky bubbly coating, not earlier. Remove from an oven and let it rest for about 5-10 minutes before serving.

- Done! Enjoy :)


*******************************************************************************************************************************


IN PICTURES

With a nice heavy knife, like mine, you won't have a problem cutting through a joint.

Skin and tendons, right under upper joint, are cut up, separated from a bone and pushed down.

One done, nine to go.. It's actually fun to do this. This time I delegated it to my big boy Danny (he's almost 20) - he liked to do this!


Adjust sriracha quantity, if you like it spicy and using it, according to your heat tolerance.


This time there was no any juices accumulated in a bottom of pan. Previously, I cooked lollipops for a large crowd and there were about 30 drumsticks, and a lot of juices. Do not forget to pour them out before roasting drumsticks with BBQ.

No basting, just dip-twist-shake method. Easy-peasy ...

That is important to let BBQ sauce to caramelize until it's dry and sticky.