Showing posts with label DK Challenges. Show all posts

Saturday, November 14, 2015

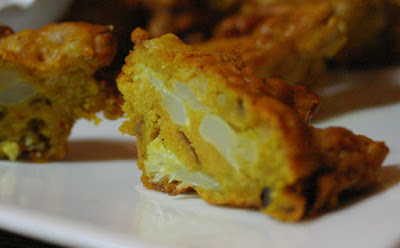
Indian Cauliflower Pakora

Indian pakora is essentially a vegetable fritter. But without using flour, at all! Come here and see how these yummy fritters can also be pretty healthy!

Blog's Category: DK Challenges, Hors D'oeuvre, Indian, International, Snacks, Vegetarian


Intro

Indian pakora is Indian version of fritters, chunks of different variations of doughy vegetables, cooked in oil. But there is a wonderful detail behind pakora recipe - there is no dough! Actually, there is a batter made of chickpea (or garbanzo bean) flour called gram flour. As you know, chickpea is a legume and a great source of vegetable protein and generally, is a very nutrient-rich food. With onion, garlic and spices, added directly to a gram batter, and a piece of vegetable inside of fritter, you have yourself pretty nutritious food here. Forget that it is fried in an oil! With a rule number one - everything in moderation - these fritters are healthy option after all.


You can buy gram (chickpea) flour at any asian grocery store. Some whole food stores most likely have it also. All the rest is a matter of your creativity - you can add to a batter whatever seasoning or finely chopped vegetables you like. As a "core" of pakora, you can use practically anything - piece of vegetable, piece of meat or shrimp. But, before flying free, I suggest to make this traditional Indian pakora first :)


What is it?

Slice of raw cauliflower, dipped in chickpea flour based batter and fried in olive oil. Chopped onion, garlic and some Indian spices are added to a gram flour batter. Classic preparation calls for deep frying. I use about 1/2 inch of oil in my frying pan. As I know many Indian homecooks do just that.


Taste Description

Delicious! Cooked fritter is not just crispy on outside, it's crispy-hard, you can almost knock at it!. Inside it is soft, very flavorful, a little chewy. All that spices, onion and garlic make a wonderful combination of flavors. It has just faint hint of spiciness from a regular chili powder. If you like spicy food, you will definitely want to add some cayenne or fresh chopped chili to it. Or you can enjoy pakora with a spicy sauce! In a recipe below, I'm offering to you simple mayo-based sauce, which is spicy and a bit smoky.


How to Serve

Serve right off the stove, with a spicy mayo-base sauce (recipe below). Also, pakora is sensational with a dollop of plain sour cream on a side, or any yogurt based sauce. Dairy sauce for pacora is really good if you decide to make your pakora spicy, adding some cayenne to a batter ;)

Pakora, cooled down, is yummy also. It will keep in a fridge nicely as well - it won't be crispy next day but still will be pretty tasty. In this case I would recommend to eat it as is, cold, or place it in a toaster-oven for a five minutes - it will regain its crispiness. 


Notes

- As I mentioned above, there is so many variations for pakora - different herbs, spices, vegetables, meats and seafood additions! Be creative, but only after trying this traditional version - learning first, creativity comes after :)

- Sometimes ghee (clarified butter) is used for frying pakoras. Next time I'll try to use it and will post results. I think, it should be pretty cool.


Indian Cauliflower Pakora


For a family size platter with a pile of pakoras:
  • 1 medium cauliflower, cut in medium florets, which then cut in half
  • 2 cups of gram (chickpeas) flour
  • 1 large onion, chopped
  • 4 garlic cloves, minced
  • 2 tsp salt
  • 1 tsp ground or crushed coriander
  • 1 tsp chili powder (mild, the kind you would use for your chili)
  • 1 tsp turmeric
  • 1 tsp garam masala (or cumin powder)
  • 1.5 cup tap water
  • flavorless frying oil (I used light olive oil)
Sauce:
  • 4 tbs mayonnaise
  • 1 tbs sriracha (hot chili sauce)
  • 1 tbs ketsup manis (or any smoky sauce such as BBQ)

- In an extra-large bowl, using your hands, mix, rubbing, all ingredients together, except cauliflower, water and oil.

- Mix in water to create thick but still slow-runny batter.

- Add all cauliflower pieces into the batter and mix, turning over, to coat all pieces in batter.

- Fry in a pre-heated frying pan, 1/2 inch filled with oil, on a medium, medium-low heat, spooning pieces of battered cauliflower on a hot pan, and then flipping them over. Combine small pieces together if you wish, or fry them separately.

- Enjoy!


*******************************************************************************************************************************


IN PICTURES


Chickpea flour has such a beautiful creamy hue...

Don't skimp on onion, trust me, you'll be wanting more onion in your bite :) I used red onion, but any kind of onion is acceptable.

It's plain tap water. It's cloudy just because I'm lazy to wash measuring cup after I use it for gram flour... should I? 

It's therapeutic to feel this batter under your fingers, right? 

Do not hesitate, just throw all together and mix.


Frying is my least favorite process..What I liked about frying these pakoras - there was almost no splattering of oil around. Probably because cauliflower is not particularly juicy vegetable and other, such as onion, is enclosed in a batter!

For convenience, I suggested (above) to cut florets in half just to have fairly flat pieces. Anyway, some pyramid-shaped pieces needed third side frying...


Crispy-hard..knock, knock.. who's there? pakora :)


Pakora piece, cut in half. Remember - no flour! It's all chickpeas!

Blog-checking lines: Vimala was our host for the November daring cooks challenge and she invited us to try our hands at some Indian snacks and treats

Sunday, February 16, 2014

Spanakopita

Traditional Greek spinach pie, spanakopita, is everybody's favorite. Well, almost everybody's... I used goat cheese feta, which made filling creamier than usually. Win-win combo of crispy filo dough and rich and creamy filling has stolen my heart :)

Blog's Category: DK Challenges, International, Vegetarian


Intro

The recipe idea has come from far, Australia, where DK cook Audax offered it to us as February's challenge. I was sold to the recipe as soon as I have learnt that recipe uses fresh spinach (not precooked, and not frozen!) and does not require spinach to be cooked first. Easy to follow, it's the best recipe of a spinach pie known to me for today.

My own twist on a recipe is using goat feta cheese instead of regular cow-milk feta. The difference is creamier than usual filling and slight tanginess that goat cheese imprints on a taste.


What is it?

- This is traditional Greek spinach pie where spinach-based filling is incased in a filo dough and baked in an oven. Filling consists of fresh chopped spinach, three sorts of onion, leek and dill which mixed very well until become moist, almost pasty. Addition of salt, pepper, feta and nutmeg makes this filling well balanced and very flavorful.

 
Taste Description

It's very delicious, what else to say? Smooth, with a strong and complex flavors, filling  contrasts with a crispy, butter flavored dough. It has just right amount of a heat from a black pepper.  Overall flavors are married happily influencing each other in the best possible way. I hesitated to add such a generous amount of nutmeg that recipe called for but, no regrets - I was surprised how muted (and just right!) its flavor emerged in this recipe.


How to Serve

After taking it from an oven, let it cool down half way and enjoy its warm and indulging goodness. Keep in a fridge for a several days - just warm it up a little bit in a microwave. It makes a great addition to your lunch or a nice option for a savory breakfast.

 
Spanakopita
OR
Spinach Pie with Goat Feta


For about 12 servings:
  • about 20 filo dough sheets (half a pack)
  • 2 large bags of fresh baby spinach (a lot!), roughly chopped
  • 1 leek (only white and pale part of), finely choped
  • 1 medium red onion, finely chopped
  • 3-5 shallots, finely chopped
  • 5 green onion plants, including white parts, chopped
  • 1 bunch if fresh dill, chopped
  • 4" x 4" x 2" piece of goat feta cheese (or regular cow-milk feta)
  • 1.5 tsp black pepper, freshly ground
  • 1 tsp salt
  • 2 garlic cloves, finely minced
  • 1 c plain bread crumbs
  • 2 eggs
  • 1/2 nutmeg nut (whole), freshly grated
  • 3 tbs olive oil (preferably Extra Virgin)
  • 1 stick of butter
- In a large bowl, using your hands, mix (massage) spinach, leek, all onions, dill, feta (breaking it with fingers), nutmeg, salt, garlic and olive oil for about 5 minutes until mixture becomes somewhat pasty. It may even release some noticeable amount of water (my did not though).
 
- Add to the mix: bread crumbs, pepper, and eggs incorporating ingredients into the filling. Mix thoroughly. Set the filling aside.
 
- Prepare baking dish (about 15" x 12"). Place butter stick in a small bowl and microwave it for about 10-15 seconds until half-melted. Use not melted part of butter to grease a baking dish. Then start laying filo dough into the dish - place sheets of filo dough overlapping each other and having edges hanging around boards (refer to the pictures below). Do not forget to sprinkle a little bit melted butter between filo layers. Thus, lay about 16 sheets on a bottom and sides and leave about 4 sheets for a top. While working with filo dough, keep remaining sheets of filo covered with dry paper towel covered with a wet piece of cloth to prevent it from drying out.
 
- Pile filling into the dish with filo dough, fold hanging parts of dough up to cover the filling, sprinkling with melted butter between the layers. Place remaining 4 sheets of dough on top, again, sprinkling with melted butter. Tuck sides neatly around the pie, sprinkle melted butter on top.
 
- Using thin-bladed, long, sharp knife, cut pie into 12 pieces. Bake at 375F for about 60-70 minutes or until crust has a beautiful, deep-gold color.
*******************************************************************************************************************************
IN PICTURES


..leek..


From the beginning, volume of a filling will reduce in about tri-fold...

Don't panic if filo dough breaks, just keep going, layering whatever pieces you've got.


Even out the surface of filling and start folding dough up..


Carefully butter up the blade of your knife if you have trouble cutting the pie.


Keeping empty metal baking sheets inside my oven, while baking, is my little dirty (indeed) secret. It allows to distribute the heat inside my oven more even... I remember my mom was using bricks, laid on a bottom of an oven for the same purpose. I think pizza stone would work very well also ;). I think that bricks is a great idea but am hesitating using it - who knows what kind of toxic stuff nowadays they may expel while heated up...


I was really pleased with a color of a crust...

Level of moisture of a filling is just right!

Isn't it appetizing? Do it ;)
 
Blog-checking lines: The February Daring Cooks' Challenge was hosted by Audax of Audax Artifex. The challenge brought us to Greece with a delicious, flaky spanakopita - a spinach pie in a phyllo pastry shell.


Friday, January 17, 2014

Arancini

Arancini, Italian rice balls, are fun to eat and tasty treat to please everyone. Here are my exercises on this subject - traditional deep-fried spinach arancini versus same spinach arancini, but baked. Find out which one I liked more! 

Blog's Category: DK Challenges, International, Vegetarian


Intro

A few years ago, as I found out that there is such a thing as arancini, since then, I wanted to make them. And here we are - this month's challenge on DK is arancini! That was a real fun to have authentic recipes on hand from our host (thank you, Manu!), but it was even more fun to travel online in a search for all about arancini.

Finally, to cook, I've chosen traditional spinach and cheese filled arancini. Striving for the authenticity, I've made half-a-batch fried in a large amount of oil, practically deep fried. Here is where my stubborn nature took over the process: I have an issue - issue of cooking deep-fried food. Well, it's not even health issues that much as you probably would assume. It's mostly about wasting so much oil (dah.. I don't want to re-use that oil again). It's also about the whole messy process of deep-frying in general, and probably a bit about laziness too :). Anyway, the second half of a batch never made it to a pot with hot oil. It went to an oven! And voila, surprise, surprise - baked version I liked even better. Baked arancini had even crunchier core and were awesomely tender inside. And of course, as you can imagine, baking of arancini is cleaner and faster process as well!


What is it?

Arancini is Italian dish which resembles itself yesterday's :) risotto, shaped into balls, stuffed with different kinds of yummy stuffing and cooked (deep-fried, fried, or baked). Arancini traditionally made in a round and pear shape. I noticed that pear shaped arancini is usually filled with meat/tomato sauce - Arancini al Ragu'. My dear Italians, I apologize if there is any inaccuracy in this arancini information :)


Taste Description

Risotto passes its amazing taste onto these rice balls. But the most fun you will get from a tenderly-juicy and cheesy-stringy stuffing which is encased into crunchy coating made of rice and standard bread crumbs. Who can resist this killer combination - crunchy, gooey, cheesy, buttery goodness shaped into the most perfect of all shapes - ball?! or pear shape with a wonderful crispy tail on a top?!


How to Serve

Serve on a pad of that shockingly simple sauce I offer for you below. Don't doubt the sauce recipe, just make it as is and you will never want to try any other :)  This sauce is derived from the recipe of Italian cookbook writer Marcella Hazan who unfortunately left this world recently. In this recipe, I replaced butter with an olive oil and made couple more small twicks.
Oh, yeaaa.. this dish, of course, the best served right away, off your hands. Although I appreciate it the next day too: heated and enjoyed at a slower pace, leftovers are usually eaten at, it's not crunchy anymore but still full of flavor and textures!


Arancini
 
For 18-20 large arancini:
 
Risotto
  • 3 tbs olive oil
  • 1 onion, chopped
  • 3 cups Arborio rice
  • 1/2 cup white wine
  • 1 quart chicken stock, hot
  • about 1 quart hot water
  • 1/2 tsp salt
  • 1/2 tsp black pepper
  • 3 tbs butter
  • 1/2 cup grated parmesan
 
Arancini

  • risotto (cooked either night before or cooled down completely, see ingredients above)
  • spinach, large pack
  • 2 cups coarsely grated parmesan
  • 4 oz mozzarella, cut into 2/3" cubes
  • 2 cups bread crumbs (if you will fry your arancini)
  • 2 cups flour (if you will fry your arancini)
  • 2 eggs, slightly beaten (if you will fry your arancini)
  • 2+ cups of frying oil (if you will fry your arancini)
 
Tomato Sauce
  • 28 oz can of crushed San-Marzano tomatoes (San-Marzano tomatoes are really the best of canned tomatoes - you will feel the difference :))
  • 1 medium onion, chopped
  • 1/3 cup olive oil
  • 3 tsp sugar
  • 1 tsp black pepper (no salt!)
Tomato Sauce

- Place all sauce ingredients in a saucepan, bring to a boil, then turn heat on lowest setting and simmer, with a lid ajar, for about 1 hour. During cooking, add a few tablespoons of water if you feel your sauce is too thick. Do not forget to stir occasionally. If you are not fan of onion pieces in your sauce, then process your chopped onion with a two tablespoons of water before adding it to the saucepan.


Risotto
 
- In a large pan, pour olive oil and cook onion just until translucent, on a medium heat.

- Add dry rice and cook stirring for a 5 minutes.

- Add wine and cook for a couple minutes, stirring until absorbed.

- Start adding hot stock and then hot water, by batches, stirring all the time, one by one. Add the next batch of stock or hot water after rice absorbed almost completely the previous one.

- When rice almost cooked through, add salt, pepper, butter and parmesan, stir well and take off the heat. Rice should be very creamy but grains shouldn't be mushy and just a little bit toothy.

- Cool risotto down completely before making arancini out of it or make your risotto day before.
 
 
Arancini
 
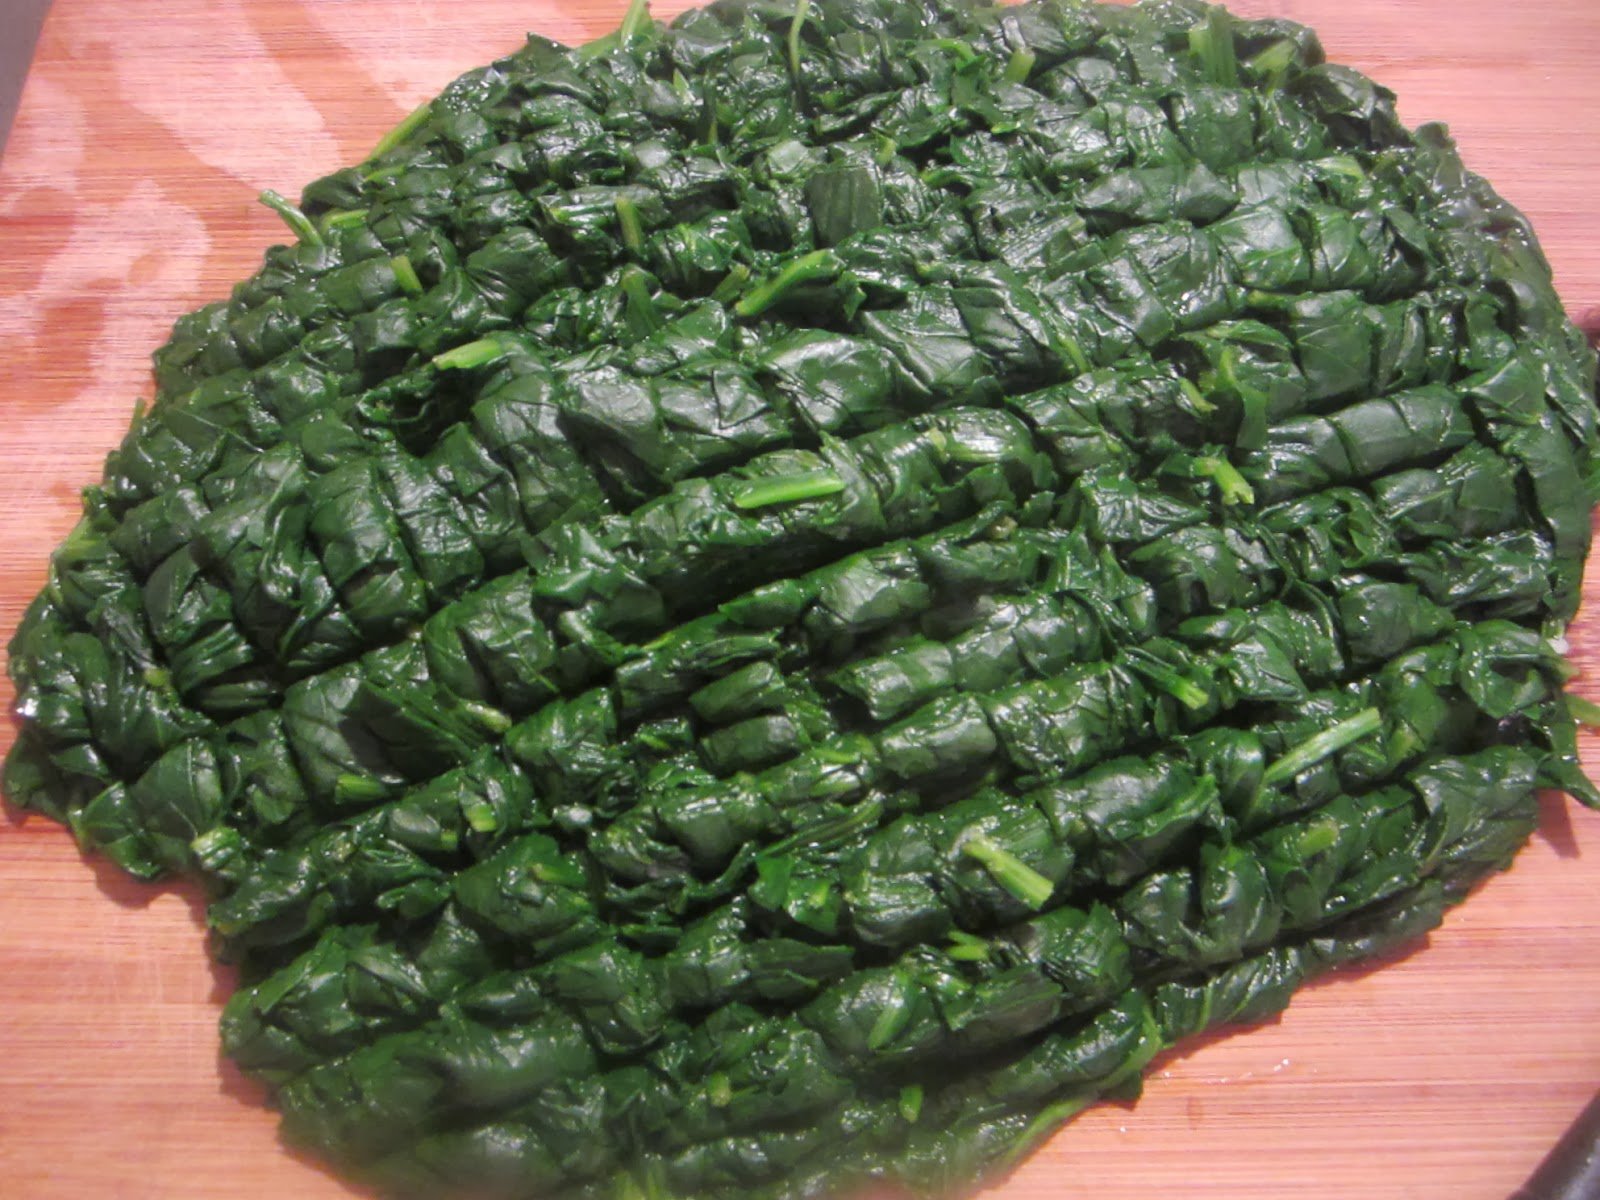
- Throw spinach into boiling water for a minute or two just until wilted. Drain. Cool down. Roughly chop and squeeze (not too much though) to get rid of excess of water.
 
- Mix spinach with parmesan.
 
- Take about 1 tablespoon of cold risotto, shape into a ball and, with your thumb, make a large hole in it. Fill it with 1 teaspoon of spinach mix, top with 1 mozzarella cube, cover with another teaspoon of spinach. Shape it into perfect ball, closing the filling. Add more risotto grains, if needed, to close the hole. If risotto sticks to your hands to much, wet your fingers with a drop or two of water. Make your arancini as big or as small as you wish but I figured out that my 2"-diameter balls are optimal size for a lazy gourmande :)
 
- To deep fry arancini, coat them first in a flour, then in eggs, and then in bread crumbs. Using slotted spoon, carefully transfer arancini into hot oil and fry until golden brown.
 
- To bake your arancini, there is no need to coat them into flour, egg and bread crumbs. Just place them on a greased baking sheet or ideally, as I do, on a bare silicon mat, placed inside of baking sheet. Sprinkle arancini with some grated parmesan and bake at 400F in a preheated oven for about 40 minutes or until well crusted and golden.
 
- Serve your arancini, laid on a bed of nice and hot tomato sauce. Sprinkling with finely grated Parmigiano-Reggiano wouldn't hurt! Enjoy!


*******************************************************************************************************************************
IN PICTURES
Just San-Marzano tomatoes give this sauce deep wonderful red color and flavor. I adore this recipe. Notice that recipe doesn't call for salt - amusingly, but it really doesn't need salt. Making this sauce for a first time I was in doubts regarding this, but never after.. so.. not salt! :)

This is my risotto I cooked a day before.

Just throw spinach as is, out of package, into a boiling water and cook for a minute or two. Drain.

Pretty, meaty, awesome spinach.


Cubed mozzarella.

Roughly chopped spinach and grated parmesan.


I made this particular arancini with a two "pieces" of risotto - second piece will go on top of whatever you see on this picture. I believe that everyone has its own favorite way of shaping them :)
 
My arancini were about 2" in diameter.


This is why I don't like whole frying process - so much mess and extra-steps.. [sigh]


..so much wasted oil..

..though looking so pretty :) Does it worth a fuzz? I donno :)


Those are just come out of oven - easy-peasy. Their shape are not perfect ball anymore, more like dome.

Nevertheless, coming out of oven, they are perfectly crunchy even without any bread crumbs coating.

Baked arancini, resting in a pool of tomato sauce, garnished with Parmigiano-Reggiano.