Showing posts with label Indian. Show all posts

Thursday, October 12, 2017

Indian Vegetable Korma

Cooked vegetables, in a rich and flavorful nut sauce, resembles popular Indian Vegetable Korma. If you vegan or vegetarian, korma just must be on your menu.

Blog's Category: Healthy, Indian, International, Vegan,  Vegetarian


- This is South-Indian version of Indian korma (or kurma). Korma is vegetable, or chicken, stew, cooked in thick, rich sauce. While other Indian regions use yogurt or cream as a base for sauce, South Indian cuisine uses coconut based sauce. That is why this South-Indian variation is just perfect for vegans. Did I mention it is also extremely delicious?

- Although naan bread is perfect to eat with korma, I enjoyed my korma with a nicely toasted "everything" bagel, smudged with a cream cheese (it could be avocado or even slice of Manchego, one of my favorite types of sheep's cheese). Also korma is great served with rice, as pictured here.

- You can use frozen vegetables for korma, but I prefer fresh ones.. maybe just frozen green peas :) 

- Here is the least of vegetables well-suited for korma: potato, green beans, cauliflower, broccoli, zucchini, yellow squash, carrots, green peas, sweet potato, butternut squash, even spinach or kale. Use any combination of them to your liking. Potato and green peas are highly recommended though.

- One more great feature - korma doesn't lose its perfection after staying in a fridge for a few days, which makes it ideal for make-ahead dish, or take-to-work-lunch ;)

Indian Vegetable Korma


Vegetables
    • 1 c frozen green peas
    • 2 c cauliflower floweretts 
    • 1 c green beans
    • 1-2 small yellow squash, diced
    • 1 carrot, diced
    • 2 potatoes, peeled and diced
    Other ingredients
    • 1 c raw cashews
    • 1 c dry coconut flakes (unsweetened), or you can use fresh coconut 
    • 1 small piece of cinnamon (or 1/2 tsp ground cinnamon)
    • seeds from 2 cardamom pods (or 1/2 tsp cardamom powder)
    • 1/2 tsp fennel seeds (optional)
    • 1/2 tsp turmeric powder
    • 1 tsp cumin seeds (or 1/2 cumin powder)
    • 1 tsp red chili powder (adjust according to your love for spicy food)
    • 1 tbs coriander seeds (or 2 tsp coriander powder)
    • 1-2 green chilies (omit if you don't like spicy food)
    • 1" of fresh ginger, sliced thinly
    • 3 tomatoes, diced
    • 10 curry leaves (optional, they are tricky to catch in Indian grocery stores)
    • 1 c water
    • 4 tbs olive oil (or ghee if you are not vegan)
    • 1/2 tsp asafoetida (optional, can be bought at Indian grocery)
    • 1-2 tsp salt (to taste)
    - Soak nuts and coconut flakes for at least one hour or overnight.

    - In a large pot, place vegetables, add water to barely cover vegetables, bring to a boil, then simmer until completely cooked. Meanwhile prepare sauce.

    - Grind dry spices (if not using already ground ones). In a blender, add soaked cashews, coconut, all ground spices, green chilies, tomatoes and water. Process until still grainy but smooth. Add water if needed, it has to be of consistency of pancake batter.

    - Now we need to cook sauce, before adding it cooked vegetables. For this, add olive oil to a pan, pour sauce in and cook at medium heat, stirring for about 15 minutes until sauce will be cooked - you will see exactly when it happened, water content reduce and olive oil will separate.

    - Partially drain water from cooked vegetables leaving about 1-2 cups of liquid in a bottom of your pot with vegetables. Pour your cooked sauce on top, add curry leaves and salt and simmer for about 10 minutes, carefully stirring occasionally. Now, enjoy!!


    *******************************************************************************************************************************
    In Pictures

    Pouring water for soaking cashews and dry coconut flakes

    Pouring water to cook my vegetables

    I used whole cinnamon bark, not cinnamon powder. I'm not big fan of cinnamon in a savory dishes. Despite that I loved when I bit on a tiny pieces of cinnamon in a final dish.. surprise :)

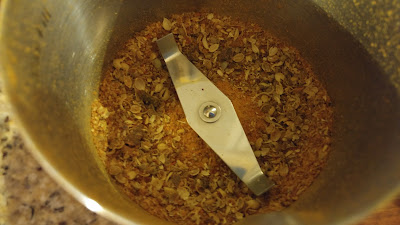
    I have grinder dedicated to grinding spices. For an easier version, I think, just use store-bought ground spices.

    Don't repeat my mistake blending sauce in a food processor - I had it all spilled under a central spinning section of my processor. Use blender :)


    Well, I had some spillage/disaster/mess but after all sauce was done.

    Actually, I used a small piece of butter along with olive oil. 

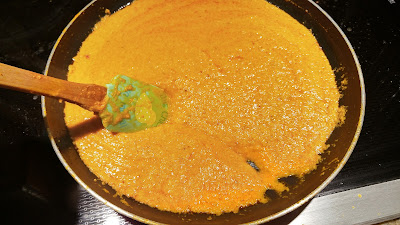
    Starting to cook my korma sauce.


    Cooked sauce goes on a top of vegetables.

    Salt in..

    I didn't have fresh curry leaves, but I had a dry ones. Rub them between palms and add there. No problem if you don't have curry leaves at all.


    That's my korma lunch. Delicioso :)

    Wednesday, May 4, 2016

    Indian Mango Rice

    You can't beat the convenience of all-in-one dish, right? That's why I love Indian fried rice, its delicious and flavorful combinations, especially beloved by vegans as it contains all plant-based nutrition your body needs. Let's try Mango Rice.

    Blog's Category: Healthy, Indian, International, Vegetarian


    Intro

    I can proudly tell, that I'm not a newcomer in a world of Indian cooking and already made various Indian dishes, including rice dishes of course. This time it's mango rice just because I come across terribly green mango at my last shopping trip to grocery store. It is exactly what recipe for Mango Rice calls for!

    As an extra bonus, please note in this recipe how a rice is cooked. I love this method because it doesn't require precise measurements nevertheless giving perfect rice every time! This method (see below) especially great for a fried rice when it is so convenient to use pre-cooked rice. Also this rice is a great way to cook rice as a make-ahead side dish and keeps in a fridge for up to two weeks.


    What is it?

    Indian Mango Rice is type of fried rice - pre-cooked rice, fried with some flavorful Indian spices, fresh green mango, some lentils and peanuts as your proteins.


    Taste Description

    For good or bad, but mango is barely recognizable in this recipe. Although it gives some subtle fruity undertone to the whole dish. My favorite part - peanuts and crunchy bits of lentils. Overall, it's pretty mild but beautifully aromatic dish.


    How to Serve

    Serve hot or warm as a main vegetarian course, or as a side to a grilled meat or fish. It will keep in your fridge for up to one week.


    Side Notes

    - If you would like to make a bigger batch, do not forget, along with a rice amount, to increase the amount of mango and cooking oil. Otherwise you are risking to end up with a dry rice - this dish tend to become dry if ratios are off.

    - Other than ratio mango/rice/oil, this recipe is very adaptable and forgiving. Don't let absence of one of the ingredients to stop you from cooking this mango rice. That's a beauty of Indian recipes - numerous ingredients, mostly spices, allows you to skip on one or two of them ;)


    Indian Mango Rice


    For about 6 servings:
    • 2 c rice (prefereably basmati rice) 
    • 1 underriped (green) mango, peeled and coarsely grated
    • 1 c raw peanuts (preferably spanish, skin-on)
    • 2 tbs chana dal
    • 2 tbs urad dal
    • 2 tbs mustard seeds
    • 2 small dry red chili peppers
    • 1/2 tsp turmeric powder
    • 1 inch fresh ginger, grated
    • salt to taste
    • 6 tbs olive oil
    • 12 fresh curry leaves (optional, but highly recommended)
    • 3 small fresh green chili peppers (or 1/2 tsp cayenne powder) - omit altogether if you don't like it spicy
    - Make sure your ingredients are prepared according ingredient list above.

    - In a large pot, bring about 3 liters of water to a boil. Pour dry rice in a boiling water and cook exactly 8 minutes. Drain, set aside. Your rice is precooked and in a perfect condition to be used in fried rice recipes or kept in a fridge for a handy ready-to-eat side (just add butter or olive oil and some seasoning).

    - In a frying pan, on a medium heat, heat half of your oil (3 tbs) and cook peanuts until they start to get some color. Then add chana and urad dal, mustard seeds, dry red chili pepper, green chili pepper and curry leaves. Cook at medium-low heat until curry leaves dry out and urad dal becomes beige. Transfer to a plate.

    - Using the same frying pan, add olive oil and cook grated mango for one minute. Add turmeric, ginger and some salt. Add one cup of water and cook, stirring for 2 more minutes. Add pre-cooked rice and nut/dal mix. Cook stirring for one minute. Adjust salt if needed. Take off heat. Your mango rice is beautiful and ready for you, enjoy!

    
    *******************************************************************************************************************************


    IN PICTURES

    With this method of cooking rice, no need to rinse a rice because it is cooked in a disproportionally large amount of water. Don't forget to set timer to 8 minutes.

    Stir a couple of times during cooking just to break a mass of rice in a bottom.

    Drain. Rinse with a cold water if you wish.


    My favorite leaf-spice ever - curry leaves (upper right corner), Knocking-out flavor ever IMHO :)

    Peanuts are half-cooked - time to add dals, mustard seeds, peppers and curry leaves.


    Despite the fact  that I put two dry red chilies, three green ones with a long cut along to length to release some heat out, my rice was very mildly spiced. So, if you are like me, and like heat in your food, add some more peppers or add a pinch or two of cayenne pepper.

    I admit, I used child labor for mango grating :)))

    As usual, I keep my ginger in a freezer. This way it's always fresh and ready to be grated (no peeling!) into fine airy substance.

    Green mango flesh is pale-yellow.


    This is where from awesome yellow color of my Mango Rice has come.

    If you frying pan large enough, mix all ingredients together right there, continuing to cook them for about one minute. If not, as happened to me, just transfer all, rice, cooked mango and cooked dal mix, in a large bowl. And be done with it. Enjoy!


    I love to chew on curry leaves as they come to my spoon :)

    Saturday, November 14, 2015

    Indian Cauliflower Pakora

    Indian pakora is essentially a vegetable fritter. But without using flour, at all! Come here and see how these yummy fritters can also be pretty healthy!

    Blog's Category: DK Challenges, Hors D'oeuvre, Indian, International, Snacks, Vegetarian


    Intro

    Indian pakora is Indian version of fritters, chunks of different variations of doughy vegetables, cooked in oil. But there is a wonderful detail behind pakora recipe - there is no dough! Actually, there is a batter made of chickpea (or garbanzo bean) flour called gram flour. As you know, chickpea is a legume and a great source of vegetable protein and generally, is a very nutrient-rich food. With onion, garlic and spices, added directly to a gram batter, and a piece of vegetable inside of fritter, you have yourself pretty nutritious food here. Forget that it is fried in an oil! With a rule number one - everything in moderation - these fritters are healthy option after all.


    You can buy gram (chickpea) flour at any asian grocery store. Some whole food stores most likely have it also. All the rest is a matter of your creativity - you can add to a batter whatever seasoning or finely chopped vegetables you like. As a "core" of pakora, you can use practically anything - piece of vegetable, piece of meat or shrimp. But, before flying free, I suggest to make this traditional Indian pakora first :)


    What is it?

    Slice of raw cauliflower, dipped in chickpea flour based batter and fried in olive oil. Chopped onion, garlic and some Indian spices are added to a gram flour batter. Classic preparation calls for deep frying. I use about 1/2 inch of oil in my frying pan. As I know many Indian homecooks do just that.


    Taste Description

    Delicious! Cooked fritter is not just crispy on outside, it's crispy-hard, you can almost knock at it!. Inside it is soft, very flavorful, a little chewy. All that spices, onion and garlic make a wonderful combination of flavors. It has just faint hint of spiciness from a regular chili powder. If you like spicy food, you will definitely want to add some cayenne or fresh chopped chili to it. Or you can enjoy pakora with a spicy sauce! In a recipe below, I'm offering to you simple mayo-based sauce, which is spicy and a bit smoky.


    How to Serve

    Serve right off the stove, with a spicy mayo-base sauce (recipe below). Also, pakora is sensational with a dollop of plain sour cream on a side, or any yogurt based sauce. Dairy sauce for pacora is really good if you decide to make your pakora spicy, adding some cayenne to a batter ;)

    Pakora, cooled down, is yummy also. It will keep in a fridge nicely as well - it won't be crispy next day but still will be pretty tasty. In this case I would recommend to eat it as is, cold, or place it in a toaster-oven for a five minutes - it will regain its crispiness. 


    Notes

    - As I mentioned above, there is so many variations for pakora - different herbs, spices, vegetables, meats and seafood additions! Be creative, but only after trying this traditional version - learning first, creativity comes after :)

    - Sometimes ghee (clarified butter) is used for frying pakoras. Next time I'll try to use it and will post results. I think, it should be pretty cool.


    Indian Cauliflower Pakora


    For a family size platter with a pile of pakoras:
    • 1 medium cauliflower, cut in medium florets, which then cut in half
    • 2 cups of gram (chickpeas) flour
    • 1 large onion, chopped
    • 4 garlic cloves, minced
    • 2 tsp salt
    • 1 tsp ground or crushed coriander
    • 1 tsp chili powder (mild, the kind you would use for your chili)
    • 1 tsp turmeric
    • 1 tsp garam masala (or cumin powder)
    • 1.5 cup tap water
    • flavorless frying oil (I used light olive oil)
    Sauce:
    • 4 tbs mayonnaise
    • 1 tbs sriracha (hot chili sauce)
    • 1 tbs ketsup manis (or any smoky sauce such as BBQ)

    - In an extra-large bowl, using your hands, mix, rubbing, all ingredients together, except cauliflower, water and oil.

    - Mix in water to create thick but still slow-runny batter.

    - Add all cauliflower pieces into the batter and mix, turning over, to coat all pieces in batter.

    - Fry in a pre-heated frying pan, 1/2 inch filled with oil, on a medium, medium-low heat, spooning pieces of battered cauliflower on a hot pan, and then flipping them over. Combine small pieces together if you wish, or fry them separately.

    - Enjoy!

    
    *******************************************************************************************************************************


    IN PICTURES


    Chickpea flour has such a beautiful creamy hue...

    Don't skimp on onion, trust me, you'll be wanting more onion in your bite :) I used red onion, but any kind of onion is acceptable.

    It's plain tap water. It's cloudy just because I'm lazy to wash measuring cup after I use it for gram flour... should I? 

    It's therapeutic to feel this batter under your fingers, right? 

    Do not hesitate, just throw all together and mix.


    Frying is my least favorite process..What I liked about frying these pakoras - there was almost no splattering of oil around. Probably because cauliflower is not particularly juicy vegetable and other, such as onion, is enclosed in a batter!

    For convenience, I suggested (above) to cut florets in half just to have fairly flat pieces. Anyway, some pyramid-shaped pieces needed third side frying...


    Crispy-hard..knock, knock.. who's there? pakora :)


    Pakora piece, cut in half. Remember - no flour! It's all chickpeas!

    Blog-checking lines: Vimala was our host for the November daring cooks challenge and she invited us to try our hands at some Indian snacks and treats