Wednesday, May 11, 2016

Egg And Cheddar Salad

Egg-&-Cheddar Salad, Cheddar and Egg Spread, Egg and Cheddar Dip, Egg & Cheese Crostini... does it really matter how to call it? The most important - it's delicious. Below is an easy, no-fail way to make it.

Blog's Category: Hors D'oeuvre, My Staple Food, USSR-era Recipes


Intro

This recipe is way too familiar for those who grew in USSR. Grated cheese mixed up with some garlic and mayonnaise was a staple at any celebratory feast in my Soviet's past. But wait a minute... The recipe below is not not exactly that. It's more refined version of this, and, yes, more delish. Care to try?  


What is it?

Finely grated sharp white cheddar cheese is mixed with finely grated boiled eggs, good-quality mayo and garlic. This airy cheese mix tops whole-wheat toast, rubbed with garlic, and garnished with radish and green onion.


Taste Description

Prompt disappearance from a plate is guaranteed. Really. Buttery, yet prominent texture, garlicky flavor over sharp cheddar, toned down with a smooth taste of eggs and mayo umami. Oh, yeaa, and all this goodness sits on a crunchy-chewy toast...mmmm.


How to Serve

- The beauty of this perfect appetizer is that you can serve it right away, garnished almost with anything you have on hand.
- Or you can place it on a plate, cover with a plastic wrap, pop in a fridge and have it ready for your tomorrow's party. 
- Or you can transfer cheddar mix into one container, place all your toasts, rubbed with a garlic, into other container and keep it on your refrigerator shelf for a whole week to enjoy it as a snack. 
- Or you can use it as a dip for your favorite chips, if your kids already ate all your garlicky toasts already.
- Or you can make sandwich with it, if you are out of chips, or your hubby liked those garlicky toasts too much..

Egg and Cheddar Crostini


For about 20 small crostini:
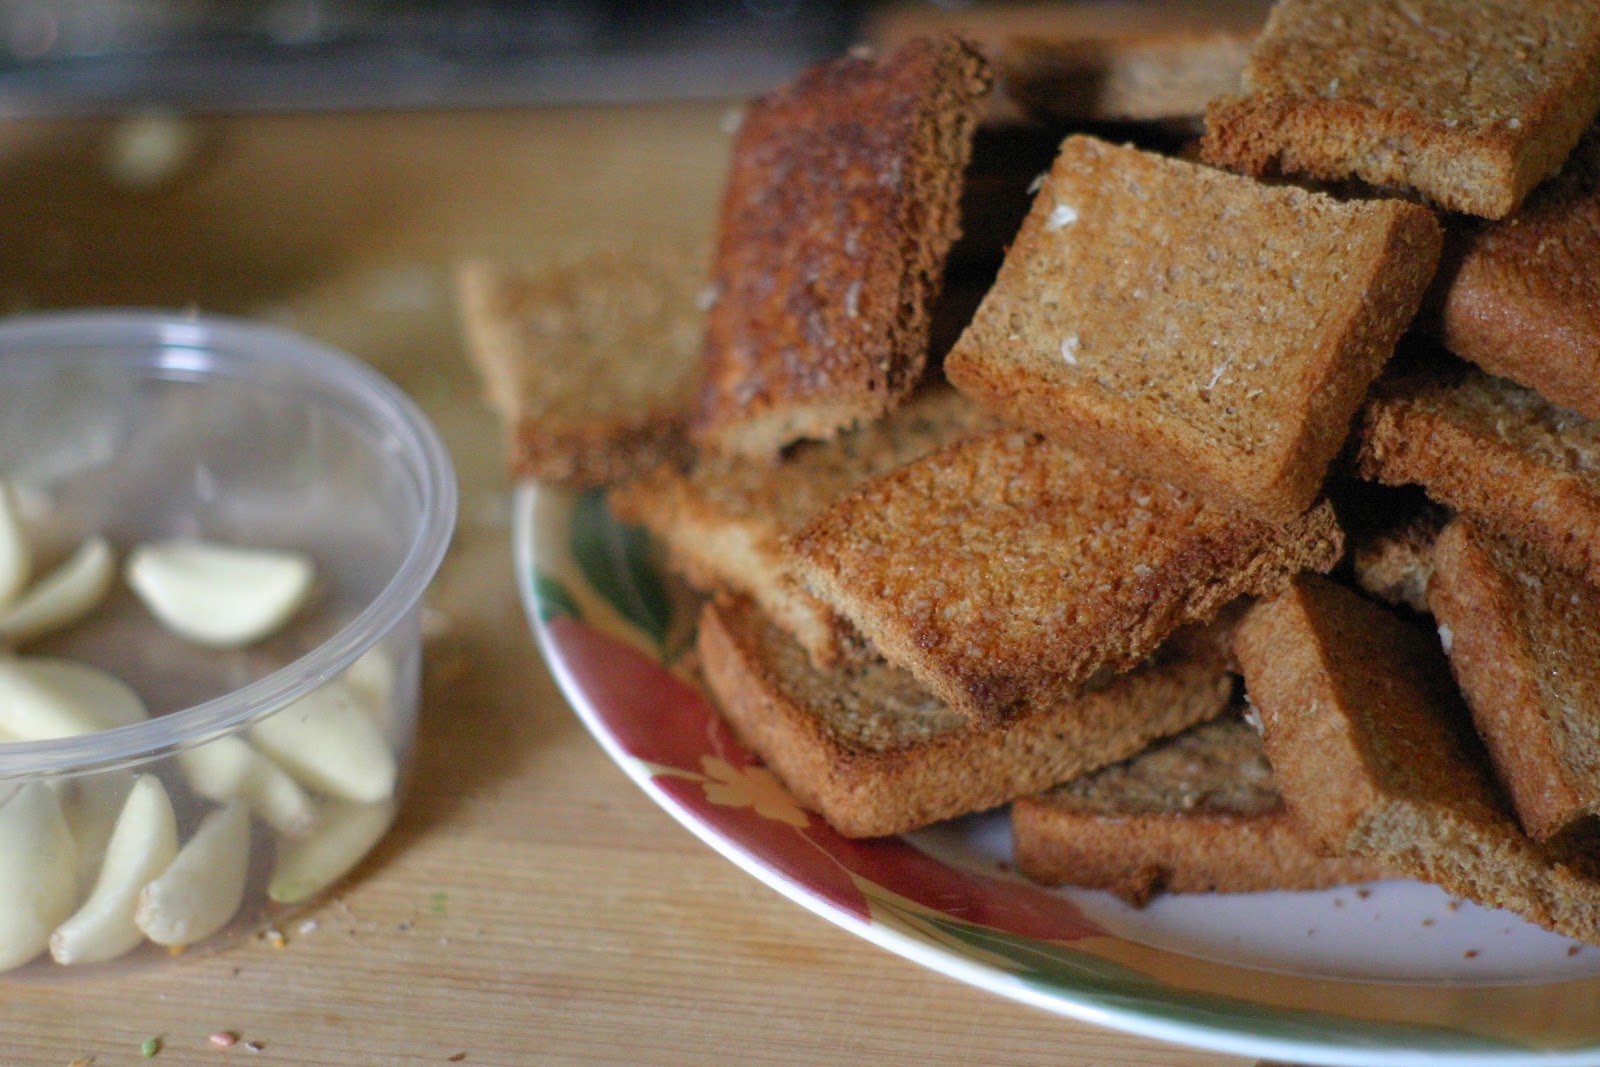
  • 5 slices of whole-wheat bread
  • 8 oz sharp white cheddar cheese
  • 4 hard boiled eggs
  • 4 tbs good quality mayonnaise
  • 7-8 garlic cloves (you will use a lot for rubbing of toasts)
  • some salt to taste
  • 4 radishes, thinly sliced (for garnish)
  • 1-2 green onions, thinly sliced diagonally
- Cut each bread slice into 4 small squares. Toast them, without oil, in a preheated to 300F oven until golden brown. 

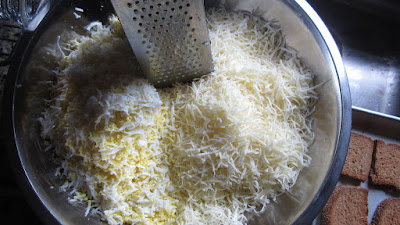
- Grate cheese and eggs using fine grater. 

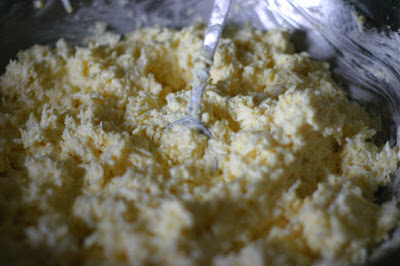
- Add 3 garlic cloves, finely grated, to mayonnaise, mix well.

- In a large bowl, mix together cheese, eggs, mayo and a little bit of salt. Do not stir, rather turn it over, and over without over-mixing, creating airy mix. Set aside.

- Rub both sides of toasts with a garlic.

- Plate crostini on a wide shallow dish, topping it with a cheese mix and garnishing with radish and green onion (see pictures below).. and enjoy!


*******************************************************************************************************************************


IN PICTURES


Wednesday, May 4, 2016

Indian Mango Rice

You can't beat the convenience of all-in-one dish, right? That's why I love Indian fried rice, its delicious and flavorful combinations, especially beloved by vegans as it contains all plant-based nutrition your body needs. Let's try Mango Rice.

Blog's Category: Healthy, Indian, International, Vegetarian


Intro

I can proudly tell, that I'm not a newcomer in a world of Indian cooking and already made various Indian dishes, including rice dishes of course. This time it's mango rice just because I come across terribly green mango at my last shopping trip to grocery store. It is exactly what recipe for Mango Rice calls for!

As an extra bonus, please note in this recipe how a rice is cooked. I love this method because it doesn't require precise measurements nevertheless giving perfect rice every time! This method (see below) especially great for a fried rice when it is so convenient to use pre-cooked rice. Also this rice is a great way to cook rice as a make-ahead side dish and keeps in a fridge for up to two weeks.


What is it?

Indian Mango Rice is type of fried rice - pre-cooked rice, fried with some flavorful Indian spices, fresh green mango, some lentils and peanuts as your proteins.


Taste Description

For good or bad, but mango is barely recognizable in this recipe. Although it gives some subtle fruity undertone to the whole dish. My favorite part - peanuts and crunchy bits of lentils. Overall, it's pretty mild but beautifully aromatic dish.


How to Serve

Serve hot or warm as a main vegetarian course, or as a side to a grilled meat or fish. It will keep in your fridge for up to one week.


Side Notes

- If you would like to make a bigger batch, do not forget, along with a rice amount, to increase the amount of mango and cooking oil. Otherwise you are risking to end up with a dry rice - this dish tend to become dry if ratios are off.

- Other than ratio mango/rice/oil, this recipe is very adaptable and forgiving. Don't let absence of one of the ingredients to stop you from cooking this mango rice. That's a beauty of Indian recipes - numerous ingredients, mostly spices, allows you to skip on one or two of them ;)


Indian Mango Rice


For about 6 servings:
  • 2 c rice (prefereably basmati rice) 
  • 1 underriped (green) mango, peeled and coarsely grated
  • 1 c raw peanuts (preferably spanish, skin-on)
  • 2 tbs chana dal
  • 2 tbs urad dal
  • 2 tbs mustard seeds
  • 2 small dry red chili peppers
  • 1/2 tsp turmeric powder
  • 1 inch fresh ginger, grated
  • salt to taste
  • 6 tbs olive oil
  • 12 fresh curry leaves (optional, but highly recommended)
  • 3 small fresh green chili peppers (or 1/2 tsp cayenne powder) - omit altogether if you don't like it spicy
- Make sure your ingredients are prepared according ingredient list above.

- In a large pot, bring about 3 liters of water to a boil. Pour dry rice in a boiling water and cook exactly 8 minutes. Drain, set aside. Your rice is precooked and in a perfect condition to be used in fried rice recipes or kept in a fridge for a handy ready-to-eat side (just add butter or olive oil and some seasoning).

- In a frying pan, on a medium heat, heat half of your oil (3 tbs) and cook peanuts until they start to get some color. Then add chana and urad dal, mustard seeds, dry red chili pepper, green chili pepper and curry leaves. Cook at medium-low heat until curry leaves dry out and urad dal becomes beige. Transfer to a plate.

- Using the same frying pan, add olive oil and cook grated mango for one minute. Add turmeric, ginger and some salt. Add one cup of water and cook, stirring for 2 more minutes. Add pre-cooked rice and nut/dal mix. Cook stirring for one minute. Adjust salt if needed. Take off heat. Your mango rice is beautiful and ready for you, enjoy!


*******************************************************************************************************************************


IN PICTURES

With this method of cooking rice, no need to rinse a rice because it is cooked in a disproportionally large amount of water. Don't forget to set timer to 8 minutes.

Stir a couple of times during cooking just to break a mass of rice in a bottom.

Drain. Rinse with a cold water if you wish.


My favorite leaf-spice ever - curry leaves (upper right corner), Knocking-out flavor ever IMHO :)

Peanuts are half-cooked - time to add dals, mustard seeds, peppers and curry leaves.


Despite the fact  that I put two dry red chilies, three green ones with a long cut along to length to release some heat out, my rice was very mildly spiced. So, if you are like me, and like heat in your food, add some more peppers or add a pinch or two of cayenne pepper.

I admit, I used child labor for mango grating :)))

As usual, I keep my ginger in a freezer. This way it's always fresh and ready to be grated (no peeling!) into fine airy substance.

Green mango flesh is pale-yellow.


This is where from awesome yellow color of my Mango Rice has come.

If you frying pan large enough, mix all ingredients together right there, continuing to cook them for about one minute. If not, as happened to me, just transfer all, rice, cooked mango and cooked dal mix, in a large bowl. And be done with it. Enjoy!


I love to chew on curry leaves as they come to my spoon :)