Wednesday, February 27, 2019

Marinated Red Cabbage Salad

It's not just about color. Although science insists - better color means more nutrition. This marinated cabbage salad is also delicious! And easy to make too! 

Blog's Category: Appetizer, Healthy, Holidays, Salads, Side Dish, Vegetarian, Vegan


Note 

- For this recipe I was inspired by the old recipe from my Ukrainian past. Back in Kiev, we  cut regular green cabbage into fairly large pieces and blanched in a boiling water until it softens a bit. It was drained, some fresh herbs, garlic, splash of vinegar and sunflower oil, a little bit of sugar and salt was added and you had a delish dish!

- This cabbage is a great addition to any meal. It can be stored in a fridge for a few days and it is best when eaten cold.

- Some substitutions can easily be made here. I used fresh cilantro, but parsley or dill would be great here too. Use green cabbage, if you don't have a red one. But red is so pretty here :)

- Recipe calls for ground coriander. Try to toast and ground coriander seeds on your own. You will see the difference - it's huge!


Marinated Red Cabbage Salad

  • 1 small to medium size red cabbage, chopped into large bite sizes
  • 1 orange bell pepper, seeded and cut into thick matchsticks
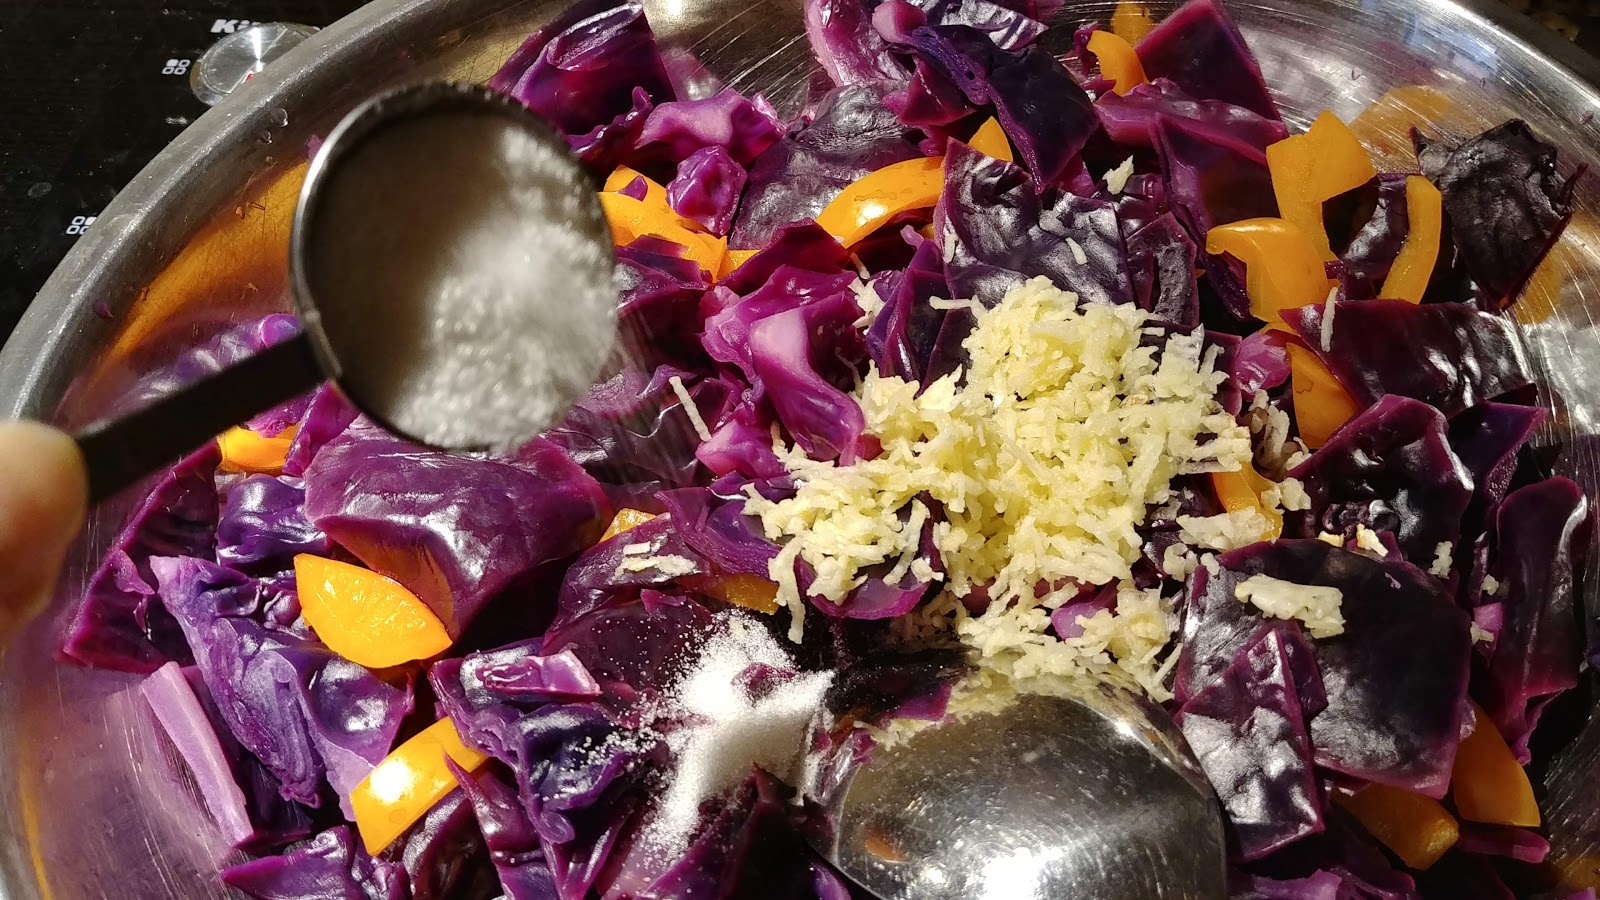
  • 5 garlic cloves, finely minced
  • 1/2 tsp salt
  • 5 tbsp white vinegar
  • 5 tbsp flavorless olive oil (or other salad oil to your taste)
  • 3 tbsp sugar
  • 1 tbsp ground coriander (preferably freshly toasted and ground)
- Bring about 1/2 large pot of water to a boil. Add cabbage, cook at medium heat just until it's half-tender. It can take about 5-10 minutes depending on how tender you like your cabbage.

- Drain into colander and transfer into large bowl. Add all vinegar and mix. Set aside.

- Bring a small pot of water to a boil and cook bell pepper for 1-2 minutes just to make it a bit softer. Drain. Add to cabbage.

- In a bowl with cabbage and pepper, still warm, add all remaining ingredients and stir it well. 

- Transfer to a fridge to cool completely.

- Enjoy it cold! It will keep in fridge for a few days.


*******************************************************************************************************************************

IN PICTURES


Tuesday, February 26, 2019

Coconut Rice Kasha with Squash/Pumpkin

This Squash Rice kasha made with coconut milk is a perfect breakfast for those who like hot cereals. It is so much better than boring oatmeal.  In fact it is a type of rice pudding, but pumpkin takes it a whole level up!

Blog's Category: Healthy, International, Perfect Breakfast, Ukrainian, Vegetarian, Vegan


I remember this kasha from my childhood, my mom loved it so much. She cooked it with whole milk, not a coconut milk. Well, we had no idea what coconut milk is at that time. It's a different thing now. I love coconut milk, and decided to try modifying the familiar recipe. Turned out, rice, coconut milk and squash (or pumpkin) is a union created in heaven. Jasmine rice, coconut and pumpkin give away so much flavor and tasty sweetness that it is more like dessert than just a casual breakfast.

Note 

- Recipe requires almost no additional sugar.

- I like to use fragrant Jasmine rice for this recipe.

- When buying canned coconut milk, check the ingredients - it is better if your coconut milk has a fewer ingredients and they are all natural and familiar. Such coconut milk tastes much better as well. 

- Any kind of pumpkin or winter squash can be used here. Although, I like to buy kabocha squash or pale-skinned pumpkin-like squash at Asian grocery stores. Those are so sweet. If you are not up to looking for those types, by all means, use butternut squash. It is great too!

- Don't throw away pumpkin seeds. Roasted, they are such a delicious and healthy treat. it's easy to rinse them and roast in a toaster oven. I included instructions how to do this in the recipe below. If you definitely decided that you want your pumpkin seeds, then don't buy kabocha squash as it has extremely hard-shelled seeds, unless you are very confident in your teeth :)


Coconut Rice Kasha with Squash

  • about 2 lb wedge of any winter squash/pumpkin
  • 2 cups Jasmine rice (optionally rinsed)
  • 1 can good-quality coconut milk
  • 1/2 tsp salt
  • 1 tbsp sugar
- Use spoon to scrape out seeds and loose fibers from pumpkin. Place all seeds into bowl with water. It makes easier to separate seeds and they won't stick together while roasting. Rinse and fish out all seeds onto baking pan covered with foil. Roast them at low temperature, about 200F, until golden, for about 30 minutes. Taste seeds occasionally to avoid getting them burnt. Oh, yeah, if you are not used to shelling pumpkin seeds, it's about time to learn - don't worry, it's not a rocket science :)

- Cut your large piece of squash into three-four large pieces to make it easier to peel. Use large knife to do this. Then dice into small pieces, about 2/3" x 2/3". You should have about 3-4 cups of diced squash.

- In a pot, add about 1.5 quart/liter water and diced squash. Bring to a boil. Add rice. Simmer until squash is very soft and rice is cooked. 

- Add coconut milk, salt and sugar. Bring to a boil. Cook, stirring for 1 minute. Remove from a heat. Taste, add more sugar if you like it sweeter. 

- Enjoy! It tastes the best when it is warm. It will keep in fridge for a several days.


*******************************************************************************************************************************


IN PICTURES

Water makes it easier to separate seeds from flesh. It also prevent sticking seeds to each other during roasting.


I bought this winter squash at my local Indian grocery store. It looks very mush like regular pumpkin, but has pale beige skin and thick meaty flesh.  It's my favorite type of winter squash - it is very flavorful, sweet and its seeds are sweet as well and easy to crack open.


Here it is simmering ...
After about 30 min at 200F seeds are done.

Very yummy


Rice and squash are completely cooked now.

While stirring in a coconut milk, soft squash partially falls apart giving beautiful yellow tint to kasha.
To me 1 tbsp of sugar is enough, just to give a bit of accent on a natural sweetness coming from a squash. Now, just bring to a boil and it's done! Easy.


Friday, February 15, 2019

Vegetarian Chickpea and Butternut Squash Pilaf

Don't let word vegetarian to trick you. This pilaf is full of flavor and utterly delicious. It is an easy and healthy recipe, you will love it! 

Blog's Category: Healthy, My Staple Food, Pilafs, Vegetarian


I cooked this pilaf numerous times and it was always up to expectation. Even my meat adoring husband loves this pilaf. For vegetarians it is one-meal-dish, full of nutrition and filling. 

This pilaf is really good with some pickled vegetables on a side, olives, pickles or sauerkraut. It is also a rich side dish for any meat dish.

Note 

- Recipe calls for basmati rice, but when I don't have it, I often use jasmine rice. 

- If you are not fan of carrots, grate or chop it finely, but do not omit it. You can even process raw carrots into course crumbles before adding it to a pilaf.

- We will cook pilaf, from beginning to the end, in one pot. Prepare a large, oven-proof pot, preferably wide and low (just for your convenience). 

- It is a limited ingredients for this pilaf. Do not omit any. Each of them has its role in a dish. You will be rewarded with a result - full-bodied, nutritious, comfort-food meal.


Vegetarian Chickpea and Butternut Squash Pilaf

  • 2 large onions, peeled and diced
  • 3 large carrots, peeled and cut into thick matchsticks (or grated)
  • 1 medium butternut squash, peeled, seeded and diced (small dices)
  • 2 heads of garlic, peeled and roughly chopped
  • 1 can garbanzo beans (chick peas), rinsed
  • 3 cups basmati rice, rinsed thoroughly and left in water to soak until required
  • 1 cup flavorless olive oil
  • 2-3 tsp salt
  • 3 cups boiling water
  • 1 tsp cayenne pepper (for mild spiciness)

- Prepare your ingredients as instructed above. As you start cooking, process will run fast.

- Turn oven on to 370F.

- Pour all olive oil in a pot and heat it up. Just before it starts to smoke, add onion and cook stirring until it soft and translucent. 

- Add carrots and butternut squash. Cook for 5 minutes, stirring occasionally.

- Drain your rice.  Add rice, garbanzo beans, garlic, salt and pepper to the pot with vegetables. Stir carefully all together, add 3 cups of boiling water. 

- Cover pot tightly with a lid or foil. Transfer to a pre-heated to 375F oven for 1 hour. 

- Enjoy!


*******************************************************************************************************************************


IN PICTURES


For Middle Eastern pilafs, as it was in South-Asian republics of USSR, traditionally, carrots were cut into thick sharp-edged matchsticks. I do the same. But sometimes, people, kids especially, don't like those carrot pieces in pilaf. Feel free to chop carrots finely, perhaps in a kitchen processor. Or grate them. Small pieces of carrots, cooked in oil first and then cooked in rice, will be rather invisible, still giving sweetness and flavor to whole dish. 

 It seems like it is a lot of oil. Do not be afraid to use that much oil. It is customary using a lot of oil in pilafs. Trust me, I regret using less when I tried.


 I'm not sure why this time I decided to use smaller pan to fry vegetables and then transfer all into glass dish before popping it in an oven. Please do as I instructed in a recipe - use a large, oven-proof pot for everything, cooking on a stove, adding all ingredients and then cooking in an oven.


 Picture does not tell you how yummy it is. Well... it is!

You may think this pilaf does not have any flavorful spices! Then you probably have no idea how much flavor all these ingredients have, well enough to forget about any kind of regular spices ;) Please try this recipe as is!