Wednesday, August 28, 2013

Garlicky Cheese Spread

It's cheese appetizer well known to all ex-USSRians. Easy to make, inexpensive cheese spread, everybody's pleaser and would be a great candidate for hors d'oeuvre table if ... it would not have that much garlic in it. So, be aware of Garlic Dragon Breath!

Blog's Category: Hors D'oeuvre, International, My Staple Food, USSR-era Recipes


Intro

Of course you can put just a little bit of garlic in this spread but then it would not be the same at all. Fare amount od garlic make this spread that good.

Back in USSR, into wavy 70ties and 80ties, into the times of total deficits, we didn't have much choice in regard of cheeses as well. Our groceries were always loaded with one variety - small 3"x2" brick of processed cheese, wrapped in foil. It was the main ingredient for this Garlicky Cheese Spread. Now, we use any kind of cheese. Depending on variety you will get slightly different taste. The best bet for this recipe would be using soft cheeses such as muenster, gouda, provolone or mozzarella. I would not use American processed cheeses but you can try. Mix of two cheeses works very well also. In the recipe below I used mozzarella and feta just to add an extra zing from the saltiness of feta.


What is it?

Hand grated cheese mixed with mayonnaise and garlic. That's it! No other seasoning is required, not even salt! Though it's a matter of personal preference.


Taste Description

Garlic rules in this recipe. Its strong taste and flavor is infused very naturally into smooth, a bit chunky texture of this spread. Mayonnaise brings everything together and finishes up your taste buds experience perfectly.


How to Serve

It's great on a top of rye bread, or as one of your sandwich layers. If you would like to go further - stuff baby peppers with it, or fill celery boats. 


Garlicky Cheese Spread


  • 4 oz mozarella, grated using coarse grater
  • 4 oz feta, grated using coarse grater
  • 2 tbs good mayo
  • 5 garlic cloves, finely grated (I like to use microplane)

- Mix all together. Finished! Enjoy!


Note

- To make the spread softer, more delicate and add some tender tasty notes, boiled eggs, coarsely grated, are added often.

- I would use ready-grated packaged cheese just if I'm really in a hurry and need to make my spread FAST. They put some stuff in there to prevent cheese to from sticking together.

- Sometimes, my fellow ex-USSRians use fine grater to grate a cheese. It's hard for me to tell which way is better, I just realize that using coarse grater is faster :)

- A lot of additional elements can be added to this spread such as your favorite spices, or fresh herbs - your fantasy sets the limits! Although I like this very basic recipe above for the fact that being basic by any means it brings a lot of flavor and satisfaction.

- Also you can replace half of the mayo with sour cream - taste will be mellower. In this case you may want to add a pinch of salt.
*******************************************************************************************************************************
IN PICTURES


I used cookie dough spoon to make these pretty round balls on a top of my hearty rye bread.


Monday, August 26, 2013

Sticky Rice with Mango

It's traditional Thai treat. You might call it dessert, I call it divine breakfast. Give it a try, you won't regret. If you are mango or coconut addict like me, you just have to do it!

Blog's Category: International, Perfect Breakfast


Intro

Making Sticky Rice with Mango was on my "to try" list for a long time, I kept pushing it back over and over. Bag of sticky rice was on a rear of my fridge for a while also...

As most of all simple recipes, it satisfies you completely and then, you crave it again and again. Fresh mango tossed around coconut rice pudding - easy, but so-o-o-o good!

Glutinous (sticky) rice is not well known here, in US but it's widely popular in the Eastern parts of Asia where it's used mostly for sweets or breakfasts. When cooked, it is very sticky indeed.


What is it?

Sticky (glutinous) rice, cooked, then soaked with coconut milk and topped with mango, simple coconut cream sauce and sesame seeds.


Taste Description

Rice has just right amount of sweetness, tropical aroma of coconut and beautiful buttery-smooth texture.
In your spoon, this rice works together wonderfully with light saltiness of coconut cream sauce. This surprising combination strikes you first but then, supported with sweetness and flavor of mango, crunchiness and earthiness of sesame seeds, it "kills you softly" and makes you its fan forever.


How to Serve

Traditionally, it is served family style, simply, on a large serving plate, warm. I like to serve it though in an individual footed glasses, like ice cream, cold. Once, for a picnic with friends, I even served it in a short clear plastic cups; I made it night before and kept in a fridge overnight.

Sticky Rice with Mango

For about 8 servings:
  • 2 cup glutinous rice
  • 1 can coconut milk, unshaken!
  • 1 c + 1 tbs sugar
  • salt
  • 1 ripe mango, peeled and sliced in a small bite sized pieces
  • 3 tsb sesame seeds
  • 1/2 tsp corn starch

- Wash rice and leave it to soak in a cold water for about 1 hour. Cook rice in a rice cooker or steamer until completely cooked.

- Meanwhile, roast sesame seeds on a dry skillet, stirring all the time, until they puff up and have nice golden-tan tone. Set aside to cool down.

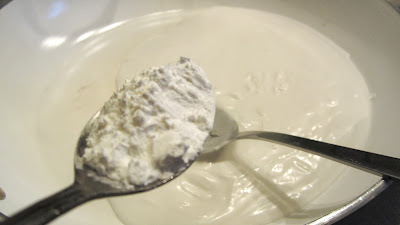
- Open coconut milk can without shaking it. Make Coconut Cream Sauce: using a spoon, take upper (about 1-2") layer of coconut milk into the small pot or skillet. Add corn starch, 1/2 teaspoon of salt and 1 tablespoon of sugar. Cook this sauce stirring on a medium heat just until it starts to boil. Set aside.

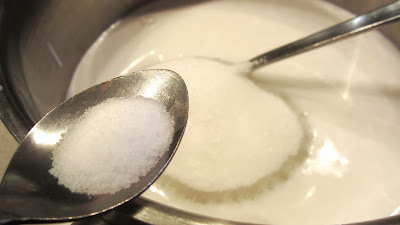
- In a small pot, cook remaining coconut milk with 1 cup of sugar and pinch of salt, on a medium heat, stirring, until it's hot but not boiling. When rice is cooked, add this sauce to the rice mixing it in lightly avoiding making rice too mushy.

- To serve, transfer rice onto a large plate, top with Coconut Cream Sauce and sesame seeds. Garnish with mango pieces. Serve warm or cold but, most importantly, ...enjoy!


Note

- To clarify, the recipe has two sauces. One is cooked from cream, gathered from the top of can of coconut milk. This sauce is used as topping. Other sauce is cooked from remaining coconut milk, it's sweeter than the first one, and is mixed into the cooked rice to make it sweet and coconutty.

- Sometimes, roasted yellow split mung beans are used in place of sesame seeds. I didn't try this way (just yet!) but will let you know as soon as I  try.

- I would be interested to try this recipe with our regular short or long grain rice, may be arborio rice.
*******************************************************************************************************************************
IN PICTURES
In appearance, glutinous rice is whiter than regular rice.

After washing and soaking, I cooked rice in my priceless Zojirushi rice cooker. But next time I'll cook it more traditional way by steaming. I'll see if it's any different.

Unshaken can of coconut milk has coconut cream as a top layer, which I will be using for topping - Coconut Cream Sauce.

I cooked Coconut Cream Sauce in a clean non-stick skillet. Significant amount of salt (comparably to sugar) makes this interesting sweet-and-salty sauce that contrasting awesomely with a sweet rice and mango.


Coconut Cream Sauce for topping is ready. Looks pretty...

Now let's make soaking sauce for rice using rest of the milk from a can.

This time sauce is sweet, it will infuse rice with nice coconutty sweetness.


There is an option in Zojirushi rice cooker to cook sticky (sweet) rice specifically.

Pouring coconut milk sauce into cooked rice...


Wednesday, August 21, 2013

Healthy Salmon Salad

Delicious and healthy are two requirements for everyday meals, right? This salad is a perfect fit into this scheme - proteins of wild caught salmon plus all the nutrition of raw vegetables and perfectly balanced seasoning. What a great way to satisfy your taste buds and be in peace with your inner wisdom at the same time.

Blog's Category: Awesome Findings


Intro

Another day, my co-worker, I usually exchange cooking ideas with, brought me this salad to try. As happens often with all those healthy recipes, I reserved a dash of skepticism for it but, boy oh boy, was I wrong! It was a great juicy and flavorful deliciousness.

The original recipe is taken from "The Blood Sugar Solution" book by Mark Hyman (thank you doctor Hyman!). I often adjust recipes to my liking. I did just a few minor tweaks here.


What is it?

It's just a few ingredients - canned salmon, mixed up with raw bell pepper and jalapeno, some olives, scallions and cilantro. Everything is juiced with a dressing based on balsamic vinegar.


Taste Description

Very fresh flavors and juiciness are two qualities that strikes you right away. Digging further, you are starting to notice gentle but distinct heat from jalapeno and chili. Bright cilantro aroma tamed with bell pepper flavor. Here and there you'll taste earthy notes of olives. Salmon's straight protein is a perfect fit to all this party of flavors. Brighten even more with a great balsamic/lime dressing, it's exquisite option for your everyday lunch or dinner.


How to Serve

Serve on its own, as a single low-calorie meal (possibly with some crackers on a side) or serve as a side to you main dish. It's great as filling for your baguette sandwich as well!

Healthy Salmon Salad

:
  • 1 (14 oz) can wild salmon, drained and flaked (or solid-packed tuna)
  • 3 scallions, finely shopped
  • 1 yellow bell pepper (or other color pepper), chopped
  • 1/2 jalapeno pepper, finely chopped (optional)
  • 1/2 cup cilantro, chopped
  • 1/2 cup calamata olives, thinly sliced

Dressing:
  • 1/2 lime, juice only
  • 3 tbs balsamic vinegar
  • 1 large garlic clove, minced finely
  • 1 tsp ground cumin
  • 1 tsp chili powder
  • pinch of cayenne pepper (or ajust to your taste)
  • sea salt to taste
  • ground black pepper to taste
  • 3 tbs extra-virgine olive oil


- Make a dressing and set aside
- Stir salad ingredients, add dressing - enjoy! (I think it's my shortest directions ever. In a real life, it will take just a bit more accounting a prep work :)

Note

- Instead of chili powder and cayenne I used mildly hot korean chili powder called gochugaru. It's my favorite ground red chili pepper powder - it gives food beautiful orange-red color and medium-level heat.
- When I was making the salad for a second time I didn't use jalapeno - it was still great!
- It's a great dressing recipe, make a double batch to use it somewhere else or if you like more dressing in your salads.
*******************************************************************************************************************************
IN PICTURES
At the "6 o'clock" you see my lovely gochugaru, korean chili powder. I make kimchi with it too. At "25 minutes" - french Grey Sea Salt, good stuff. In a middle, all dressing ingredients, ready to be whipped with my immersion blender, which I love to use to make dressings.


This time I used 3 small cans of solid tuna instead of salmon - same good!


Friday, August 16, 2013

Spanish Tortilla

Nope, it's not what you think! In Spain, tortilla means thick, tender/crispy potato omelet and not Mexican tortilla as we would think of. So...back to basics - potato and eggs, fried in olive oil, what can be better?

Blog's Category: International, Perfect Breakfast


Intro

This Spanish tortilla would fit so perfectly into my native Ukrainian kitchen. Simple, rustic skillet-fried potato is going to be forever the favorite for many of us who grew up in the ex-USSR; no matter how much we developed further into the magic world of international culinary empire since the iron curtain disappear in a haze of history.

Thus Spanish tortilla sounds like something very familiar and homey. Although cooking of tortilla can be a bit tricky and even shocking at first. Take a look below at step-by-step instructions. Pull up your sleeves and go ahead - the result is worth your effort.

There is a lot of variations of tortilla but all of them use potato, eggs and a lot of olive oil. The recipe below is basic. Fill free to add bell or hot pepper, herbs, chorizo or olives. But I would advise to start from basic - potato, onion and eggs.


What is it?

Skillet-fried potato and onion is mixed with eggs and then finished up in the same skillet, stove-top, to the beautiful golden-brown shell.


Taste Description

Adorable crispy gold outer layer of tortilla has all the beautiful qualities of those guilty-pleasure-fried-foods. Inside, you will love that  soft, delightful  and familiarly comforting taste of potato interlaced with tender eggs.


How to Serve

In Spain, tortilla is often served as tapas, cold, cut in wedges. I like it hot when outer part is still crispy.

Spanish Tortilla
:
  • 5 potatoes, peeled and cut in chunks not bigger than 1/2" thick
  • 1 large onion, sliced
  • 1.5 - 2 cups of olive oil (for frying) - yes, this much
  • salt, to taste
  • black pepper, to taste
  • eggs, beaten

- In a non-stick skillet, heat oil until very hot but not smoky. Dip piece of onion to taste - it should sizzle.

- Add potato and cook on a medium heat, stirring, for about 5-7 minutes. Then add onion and cook, stirring until potato is soft and completely cooked through. Turn heat down if needed  - potato shouldn't be cooked but should not get any tan/color.

- Place colander into a pot and drain (yes, drain) potato into colander. You can reuse this oil to cook something else.

- Wipe skillet with a paper towel, add about 2 tbs of oil and return to the stove.

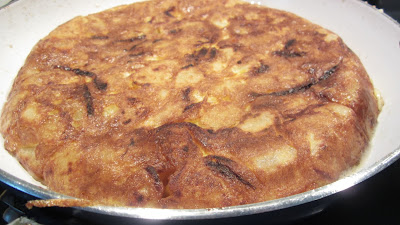
- Transfer potato into a bowl, add beaten eggs, salt and pepper, mix and pour it into the skillet. Cook on a medium heat until golden crust forms on a bottom. Then take flat plate and cover skillet with this plate. Invert tortilla onto the plate and then carefully slide it back into the skillet. Tuck in edges of tortilla neatly and continue to fry uncovered until bottom is nice, crispy and golden-brown. Take off heat, slide onto the plate, let it seat for a minute or two, slice into wedges and enjoy!

Note

- Don't worry, your tortilla won't drown in oil. A lot of oil help cook potato fast without browning it too much. Potato will soak in just a small amount of oil. You will see how much  oil will be drained out.
*******************************************************************************************************************************
IN PICTURES
Blue early morning.. I'm up for tortilla adventure. My forlks will be happy to wake up to fried potato ;)


..piece of onion is sizzling..

swimming in oil

now swimming in oil with onion


it's cooked through

potato is drained in colander


wipe up your non-stick


inverting procedure starts now
 
 
e-e-easy

tuck in edges for a picture-perfect look


sof,t tender and juicy succulent